1、netty和websock整合
前言
Github:https://github.com/HealerJean
1、main函数启动进入netty服务端
package com.hlj.netty.websocket;

import com.hlj.netty.websocket.server.WebSocketServerInitializer;
import io.netty.bootstrap.ServerBootstrap;
import io.netty.channel.Channel;
import io.netty.channel.ChannelOption;
import io.netty.channel.EventLoopGroup;
import io.netty.channel.nio.NioEventLoopGroup;
import io.netty.channel.socket.nio.NioServerSocketChannel;
import io.netty.handler.logging.LogLevel;
import io.netty.handler.logging.LoggingHandler;
import org.springframework.beans.factory.annotation.Value;
import org.springframework.boot.CommandLineRunner;
import org.springframework.boot.SpringApplication;
import org.springframework.boot.autoconfigure.SpringBootApplication;

@SpringBootApplication
public class ComHljNettyWebsocketApplication  implements CommandLineRunner {

	@Value("${server.port2}")
	private int port;

	public static void main(String[] args) {
		SpringApplication.run(ComHljNettyWebsocketApplication.class, args);
	}

	@Override
	public void run(String... strings) throws Exception {

		// 事件 循环 组
		/*
		 * Main函数开始的位置定义了两个工作线程,一个命名为WorkerGroup,另一个命名为BossGroup。
		 * 都是实例化NioEventLoopGroup。
		 * EventLoopGroup,它用于管理Channel连接的。
		 */
		//NioEventLoopGroup可以理解为一个线程池,内部维护了一组线程,每个线程负责处理多个Channel上的事件,
		// 而一个Channel只对应于一个线程,这样可以回避多线程下的数据同步问题。

		// Boss线程:由这个线程池提供的线程是boss种类的,用于创建、连接、绑定socket, (有点像门卫)然后把这些socket传给worker线程池。
                   // 在服务器端每个监听的socket都有一个boss线程来处理。在客户端,只有一个boss线程来处理所有的socket。
		EventLoopGroup bossGroup = new NioEventLoopGroup(1);

		// Worker线程:Worker线程执行所有的异步I/O,即处理操作,Worker线程用于管理线程为Boss线程服务。
		EventLoopGroup workerGroup = new NioEventLoopGroup();
		try {
//			启动NIO服务的辅助启动类,负责初始话netty服务器,并且开始监听端口的socket请求
			ServerBootstrap bootstrap = new ServerBootstrap();
			bootstrap.option(ChannelOption.CONNECT_TIMEOUT_MILLIS, 3000);
			bootstrap.group(bossGroup, workerGroup)
					.channel(NioServerSocketChannel.class)// 设置非阻塞,用它来建立新accept的连接,用于构造serversocketchannel的工厂类
					.handler(new LoggingHandler(LogLevel.INFO))
					.childHandler(new WebSocketServerInitializer()); ///通道的初始化程序, 对出入的数据进行的业务操作,其继承ChannelInitializer

			Channel ch = bootstrap.bind(port).sync().channel();
			ch.closeFuture().sync();
		} finally {
			bossGroup.shutdownGracefully();
			workerGroup.shutdownGracefully();
		}
	}
}
2、进入初始化的通道程序
1、配置将用户的id和管道进行保存 2、自定义websocket方法用来返回数据
package com.hlj.netty.websocket.server;

import com.hlj.netty.websocket.handler.ChannelStatusHandler;
import com.hlj.netty.websocket.handler.WebSocketFrameHandler;
import io.netty.channel.ChannelInitializer;
import io.netty.channel.ChannelPipeline;
import io.netty.channel.socket.SocketChannel;
import io.netty.handler.codec.http.HttpObjectAggregator;
import io.netty.handler.codec.http.HttpServerCodec;
import io.netty.handler.codec.http.websocketx.WebSocketServerProtocolHandler;
import io.netty.handler.codec.http.websocketx.extensions.compression.WebSocketServerCompressionHandler;

/**
 * Created by j.sh on 20/03/2018.
 */
public class WebSocketServerInitializer extends ChannelInitializer<SocketChannel> {

    private static final String WEBSOCKET_PATH = "/websocket";

    @Override
    public void initChannel(SocketChannel ch) {
        ChannelPipeline pipeline = ch.pipeline();
        //// HttpServerCodec:将请求和应答消息解码为HTTP消息
        pipeline.addLast(new HttpServerCodec());
        // max 1kb, HttpObjectAggregator:将HTTP消息的多个部分合成一条完整的HTTP消息
        pipeline.addLast(new HttpObjectAggregator(1024));
        pipeline.addLast(new WebSocketServerCompressionHandler());
        pipeline.addLast(new WebSocketServerProtocolHandler(WEBSOCKET_PATH, null, true));
        pipeline.addLast(new WebSocketFrameHandler());//// 在管道中添加我们自己的接收数据实现方法
        pipeline.addLast(new ChannelStatusHandler()); //将传来的用户id和生成的管道进行保存
    }

}
3、自定义的管道和设置管道的选择器
1、管道选择器
使用到了现场安全的hashmap
private static ConcurrentHashMap<String,Channel> channelMap = new ConcurrentHashMap<>();
在用户连接成功的时候,进行添加 在用户退出(关闭浏览器)的时候进行移除
package com.hlj.netty.websocket.selector;

import io.netty.channel.Channel;

import java.util.concurrent.ConcurrentHashMap;

/**
 * 通道选择器,通过通道的id获取 通道
 */
public class ChannelSelector {

    private static ConcurrentHashMap<String,Channel> channelMap = new ConcurrentHashMap<>();

    public static void addChannel(Channel channel){
        channelMap.put(channel.id().asShortText(),channel);
    }

    public static Channel getChannel(String channelId) {
        return channelMap.get(channelId);
    }

    public static void removeChannel(Channel channel) {
        channelMap.remove(channel.id().asShortText());
        ChannelRelation.removeRelation(channel);
    }

}
2、管道和用户id的保存
package com.hlj.netty.websocket.selector;

import io.netty.channel.Channel;

import java.util.concurrent.ConcurrentHashMap;

/**
 * 用户id和通道id的关系
 * 直接的关系
 */
public class ChannelRelation {

    //小兵的websocket
    private static ConcurrentHashMap<String,String> clientUidChannel = new ConcurrentHashMap<>();
    private static  ConcurrentHashMap<String,String> clientChannelUid = new ConcurrentHashMap<>();

    // 用户的id 对应通道的id
    //下面是存放通道的id, 对应用户的id
    public static void addRelation(String uid,Channel channel){
        clientUidChannel.put(uid,channel.id().asShortText());
        clientChannelUid.put(channel.id().asShortText(),uid);
    }

    public static void removeRelation(Channel channel) {
        String uid = clientChannelUid.get(channel.id().asShortText());
        if (uid != null) {
            clientChannelUid.remove(channel.id().asShortText());
            clientUidChannel.remove(uid);
        }
    }

    //根据用户id获取通道id
    public static String getChannelId(String uid) {
        return clientUidChannel.get(uid);
    }

}
4、用户连接和端口连接的控制器 ChannelStatusHandler
package com.hlj.netty.websocket.handler;

import com.hlj.netty.websocket.selector.ChannelSelector;
import io.netty.channel.ChannelHandlerContext;
import io.netty.channel.ChannelInboundHandler;
import org.slf4j.Logger;
import org.slf4j.LoggerFactory;

/**
 * Created by j.sh on 27/11/2017.
 */
public class ChannelStatusHandler implements ChannelInboundHandler {

    private Logger logger = LoggerFactory.getLogger(ChannelStatusHandler.class);


    @Override
    public void channelRegistered(ChannelHandlerContext channelHandlerContext) throws Exception {
    }
    //Channel已创建,还未注册到一个EventLoop上
    @Override
    public void channelUnregistered(ChannelHandlerContext channelHandlerContext) throws Exception {
        ChannelSelector.removeChannel(channelHandlerContext.channel());
    }
    //Channel是活跃状态(连接到某个远端),可以收发数据
    //通道选择器中添加通道
    @Override
    public void channelActive(ChannelHandlerContext channelHandlerContext) throws Exception {
        ChannelSelector.addChannel(channelHandlerContext.channel());
    }
    //Channel未连接到远端
    //通道选择器中移除通道
    @Override
    public void channelInactive(ChannelHandlerContext channelHandlerContext) throws Exception {
        ChannelSelector.removeChannel(channelHandlerContext.channel());
    }

    @Override
    public void channelRead(ChannelHandlerContext channelHandlerContext, Object o) throws Exception {
    }

    @Override
    public void channelReadComplete(ChannelHandlerContext channelHandlerContext) throws Exception {
    }

    @Override
    public void userEventTriggered(ChannelHandlerContext channelHandlerContext, Object o) throws Exception {
    }

    @Override
    public void channelWritabilityChanged(ChannelHandlerContext channelHandlerContext) throws Exception {
    }

    @Override
    public void exceptionCaught(ChannelHandlerContext channelHandlerContext, Throwable throwable) throws Exception {
    }

    @Override
    public void handlerAdded(ChannelHandlerContext channelHandlerContext) throws Exception {
    }

    @Override
    public void handlerRemoved(ChannelHandlerContext channelHandlerContext) throws Exception {
    }
}
5、websocket信息交互控制器WebSocketFrameHandler
1、当用户第一次连接的时候,应该是进入else初始化,添加管道和id的信息
var json = { //第一次传来
    from:1,
    init:1
};
2、当点击发送信息传力的json为
var json = {
    from:1,
    to:2,
    content:content
};
package com.hlj.netty.websocket.handler;
import com.fasterxml.jackson.databind.DeserializationFeature;
import com.fasterxml.jackson.databind.ObjectMapper;
import com.hlj.netty.websocket.bean.RequestBean;
import com.hlj.netty.websocket.selector.ChannelRelation;
import com.hlj.netty.websocket.selector.ChannelSelector;
import io.netty.channel.Channel;
import io.netty.channel.ChannelHandlerContext;
import io.netty.channel.SimpleChannelInboundHandler;
import io.netty.handler.codec.http.websocketx.TextWebSocketFrame;
import io.netty.handler.codec.http.websocketx.WebSocketFrame;
/**
* Created by j.sh on 27/11/2017.
*/
public class WebSocketFrameHandler extends SimpleChannelInboundHandler<WebSocketFrame> {
private ObjectMapper objectMapper = new ObjectMapper();
public WebSocketFrameHandler() {
objectMapper.configure(DeserializationFeature.FAIL_ON_UNKNOWN_PROPERTIES,false);
}
@Override
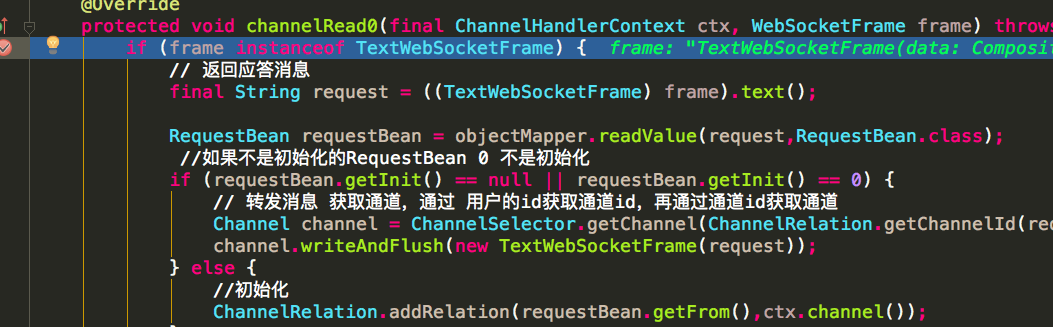
protected void channelRead0(final ChannelHandlerContext ctx, WebSocketFrame frame) throws Exception {
if (frame instanceof TextWebSocketFrame) {
// 返回应答消息
final String request = ((TextWebSocketFrame) frame).text();
RequestBean requestBean = objectMapper.readValue(request,RequestBean.class);
//如果不是初始化的RequestBean 0 不是初始化
if (requestBean.getInit() == null || requestBean.getInit() == 0) {
// 转发消息 获取通道,通过 用户的id获取通道id,再通过通道id获取通道
Channel channel = ChannelSelector.getChannel(ChannelRelation.getChannelId(requestBean.getTo()));
channel.writeAndFlush(new TextWebSocketFrame(request));
} else {
//初始化
ChannelRelation.addRelation(requestBean.getFrom(),ctx.channel());
}
} else {
String message = "unsupported frame type: " + frame.getClass().getName();
throw new UnsupportedOperationException(message);
}
}
}
6、交互的Bean
package com.hlj.netty.websocket.bean;

import java.io.Serializable;

/**
 * Created by j.sh on 20/03/2018.
 */
public class RequestBean implements Serializable{

    private static final long serialVersionUID = 6911183783207142064L;

    private String from; //来自谁
    private String to; //发给谁
    private String content; //内容是什么
    private Integer init = 0;   // 默认不是初始化

    public String getFrom() {
        return from;
    }

    public void setFrom(String from) {
        this.from = from;
    }

    public String getTo() {
        return to;
    }

    public void setTo(String to) {
        this.to = to;
    }

    public String getContent() {
        return content;
    }

    public void setContent(String content) {
        this.content = content;
    }

    public Integer getInit() {
        return init;
    }

    public void setInit(Integer init) {
        this.init = init;
    }
}
7、测试html
1、html
<!DOCTYPE html>
<html lang="en">
<head>
    <meta charset="UTF-8">
    <title>test</title>

    <script type="text/javascript" >
        var url = 'ws://localhost:9090/websocket';

        var clientWs;

        function initClient(){
            clientWs = new WebSocket(url);
            clientWs.onmessage = function (event) {
                document.getElementById("content").innerText += event.data;
            };
            clientWs.onopen = function (event) {
                var json = {
                    from:1,
                    init:1
                };

                clientWs.send(JSON.stringify(json));
            }
        }

        function webSend(){
            var content = document.getElementById('tt').value;

            var json = {
                from:1,
                to:2,
                content:content
            };

            clientWs.send(JSON.stringify(json));
        }

    </script>

</head>
<body>

<input type="button" onclick="initClient()" value="initClient"/>

<br>

<input type="button" onclick="webSend()" value="send"/>

<textarea  id="tt" cols="30" rows="10"></textarea>

<div id="content">

</div>


</body>
</html>
2、html
<!DOCTYPE html>
<html lang="en">
<head>
    <meta charset="UTF-8">
    <title>test</title>

    <script type="text/javascript" >
        var url = 'ws://localhost:9090/websocket';

        var clientWs;

        function initClient(){
            clientWs = new WebSocket(url);
            clientWs.onmessage = function (event) {
                document.getElementById("content").innerText += event.data;
            };
            clientWs.onopen = function (event) {
                var json = {
                    from:2,
                    init:1
                };

                clientWs.send(JSON.stringify(json));
            }
        }

        function webSend(){
            var content = document.getElementById('tt').value;

            var json = {
                from:2,
                to:1,
                content:content
            };

            clientWs.send(JSON.stringify(json));
        }
    </script>

</head>
<body>

<input type="button" onclick="initClient()" value="initClient"/>

<br>

<input type="button" onclick="webSend()" value="send"/>


<textarea  id="tt" cols="30" rows="10"></textarea>

<div id="content">

</div>


</body>
</html>
8、直接打开运行main函数
对于html直接打开就行,不需要走controller
1、html1 这里我打卡端口进行测试
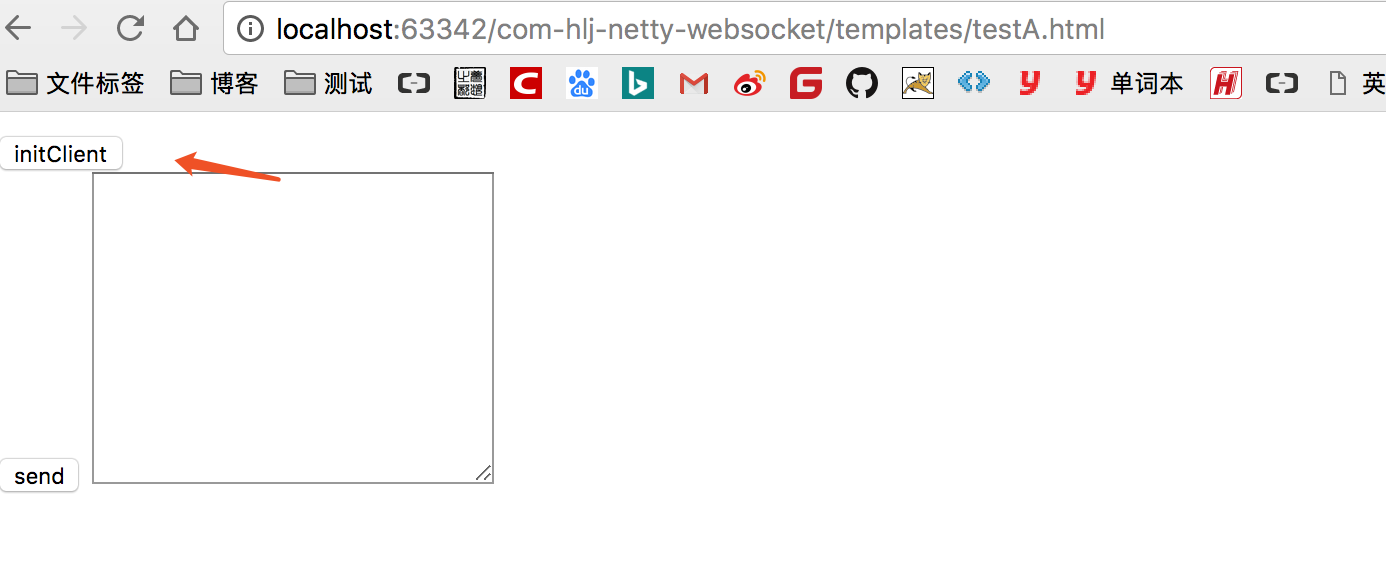
1、首先点击拦截进入到的是,这里我们将通道放到ConcurrentHashMap中去

2、接着进入的是自定义的websocket发送
3、如果关闭浏览器


3、自己打开着两个测试下吧,没什么难度
代码下载