2、MD5-加盐校验-自定义密码校验-rest密码校验-客户端service登录以及具体参数获取
前言
Github:https://github.com/HealerJean
本代码接接着上一讲代码进行。
1、服务端、sso-server中的准备
2、sso-server中添加jdbc依赖
<!--新增支持jdbc验证-->
<dependency>
    <groupId>org.apereo.cas</groupId>
    <artifactId>cas-server-support-jdbc</artifactId>
    <version>${cas.version}</version>
</dependency>


<dependency>
    <groupId>org.apereo.cas</groupId>
    <artifactId>cas-server-support-jdbc-drivers</artifactId>
    <version>5.1.2</version>
</dependency>


<!-- mysql 数据库驱动. -->
<dependency>
    <groupId>mysql</groupId>
    <artifactId>mysql-connector-java</artifactId>
    <version>6.0.6</version>
</dependency>
添加jdbc依赖后的sso-server的pom.xml如下
<?xml version="1.0" encoding="UTF-8"?>
<project xmlns="http://maven.apache.org/POM/4.0.0" xmlns:xsi="http://www.w3.org/2001/XMLSchema-instance"
    xsi:schemaLocation="http://maven.apache.org/POM/4.0.0 http://maven.apache.org/xsd/maven-4.0.0.xsd">
    <modelVersion>4.0.0</modelVersion>
    <parent>
        <groupId>com.hlj.cas</groupId>
        <artifactId>com-hlj-cas</artifactId>
        <version>1.0-SNAPSHOT</version>
        <relativePath>../pom.xml</relativePath>
    </parent>

    <artifactId>sso-server</artifactId>
    <packaging>war</packaging>

    <name>sso-server</name>
    <description>单点登录</description>


    <dependencies>
        <dependency>
            <groupId>org.apereo.cas</groupId>
            <artifactId>cas-server-webapp-tomcat</artifactId>
            <version>${cas.version}</version>
            <type>war</type>
            <scope>runtime</scope>
        </dependency>

        <!--新增支持jdbc验证-->
        <dependency>
            <groupId>org.apereo.cas</groupId>
            <artifactId>cas-server-support-jdbc</artifactId>
            <version>${cas.version}</version>
        </dependency>


        <dependency>
            <groupId>org.apereo.cas</groupId>
            <artifactId>cas-server-support-jdbc-drivers</artifactId>
            <version>5.1.2</version>
        </dependency>


        <!-- mysql 数据库驱动. -->
        <dependency>
            <groupId>mysql</groupId>
            <artifactId>mysql-connector-java</artifactId>
            <version>6.0.6</version>
        </dependency>
    </dependencies>
    <dependencyManagement>
        <dependencies>
            <dependency>
                <groupId>org.apereo.cas</groupId>
                <artifactId>cas-server-support-bom</artifactId>
                <version>${cas.version}</version>
                <type>pom</type>
                <scope>import</scope>
            </dependency>
        </dependencies>
    </dependencyManagement>

    <build>
        <plugins>
            <plugin>
                <groupId>com.rimerosolutions.maven.plugins</groupId>
                <artifactId>wrapper-maven-plugin</artifactId>
                <version>0.0.5</version>
                <configuration>
                    <verifyDownload>true</verifyDownload>
                    <checksumAlgorithm>MD5</checksumAlgorithm>
                </configuration>
            </plugin>
            <plugin>
                <groupId>org.springframework.boot</groupId>
                <artifactId>spring-boot-maven-plugin</artifactId>
                <version>${springboot.version}</version>
                <configuration>
                    <mainClass>org.springframework.boot.loader.WarLauncher</mainClass>
                    <addResources>true</addResources>
                </configuration>
            </plugin>
            <plugin>
                <groupId>org.apache.maven.plugins</groupId>
                <artifactId>maven-war-plugin</artifactId>
                <version>3.1.0</version>
                <configuration>
                    <warName>cas</warName>
                    <failOnMissingWebXml>false</failOnMissingWebXml>
                    <recompressZippedFiles>false</recompressZippedFiles>
                    <archive>
                        <compress>false</compress>
                        <manifestFile>${project.build.directory}/war/work/org.apereo.cas/cas-server-webapp-tomcat/META-INF/MANIFEST.MF</manifestFile>
                    </archive>
                    <overlays>
                        <overlay>
                            <groupId>org.apereo.cas</groupId>
                            <artifactId>cas-server-webapp-tomcat</artifactId>
                        </overlay>
                    </overlays>
                </configuration>
            </plugin>
            <plugin>
                <groupId>org.apache.maven.plugins</groupId>
                <artifactId>maven-compiler-plugin</artifactId>
                <version>3.3</version>
            </plugin>
        </plugins>
        <finalName>cas</finalName>
    </build>
</project>
2、MD5加密认证
1、创建MD5加密工具类
package com.hlj.sso.server.Utils;
import java.io.UnsupportedEncodingException;
import java.security.MessageDigest;
import java.security.NoSuchAlgorithmException;
/**
* 采用MD5加密解密
* @author tfq
* @datetime 2011-10-13
*/
public class MD5Util {
/***
* MD5加码 生成32位md5码
*/
public static String string2MD5(String inStr){
MessageDigest md5 = null;
try{
md5 = MessageDigest.getInstance("MD5");
}catch (Exception e){
System.out.println(e.toString());
e.printStackTrace();
return "";
}
char[] charArray = inStr.toCharArray();
byte[] byteArray = new byte[charArray.length];
for (int i = 0; i < charArray.length; i++)
byteArray[i] = (byte) charArray[i];
byte[] md5Bytes = md5.digest(byteArray);
StringBuffer hexValue = new StringBuffer();
for (int i = 0; i < md5Bytes.length; i++){
int val = ((int) md5Bytes[i]) & 0xff;
if (val < 16)
hexValue.append("0");
hexValue.append(Integer.toHexString(val));
}
return hexValue.toString();
}
/**
* 加密解密算法 执行一次加密,两次解密
*/
public static String convertMD5(String inStr){
char[] a = inStr.toCharArray();
for (int i = 0; i < a.length; i++){
a[i] = (char) (a[i] ^ 't');
}
String s = new String(a);
return s;
}
// 测试主函数
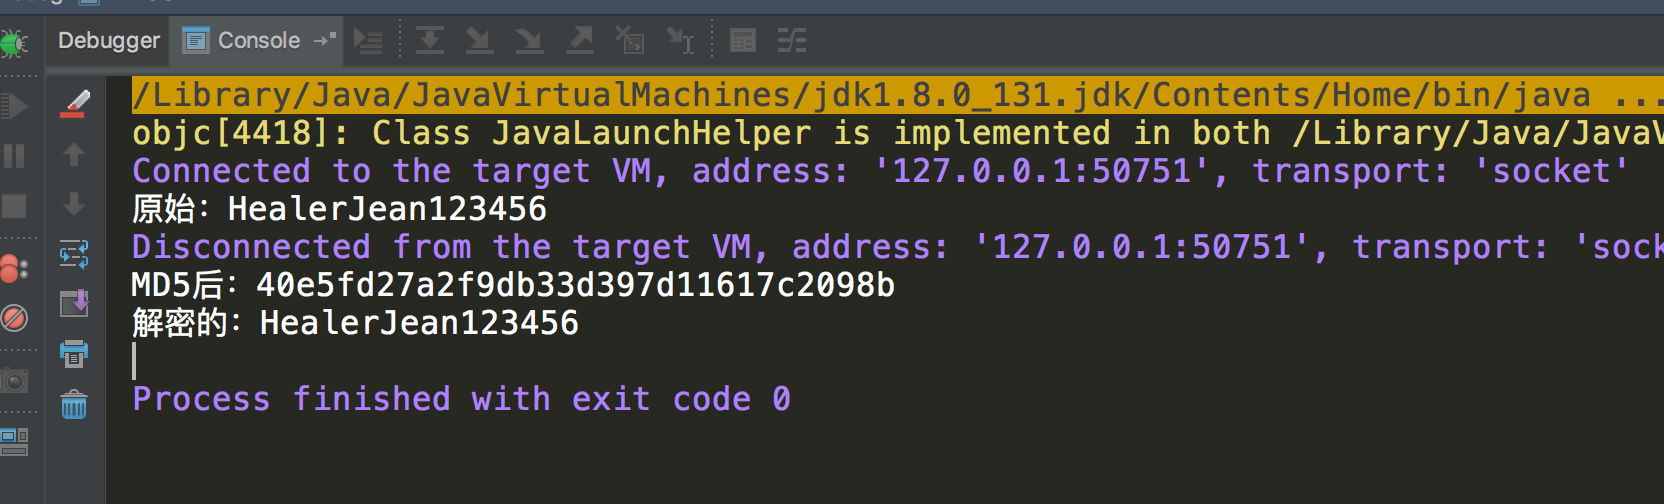
public static void main(String args[]) {
String s = new String("HealerJean456
");
System.out.println("原始:" + s);
System.out.println("MD5后:" + string2MD5(s));
System.out.println("解密的:" + convertMD5(convertMD5(s)));
}
}
2、创建数据库表和添加测试数据
| 字段名 | 字段类型 | 备注 |
|---|---|---|
| username | varchar | 登录账号 |
| password | varchar | 密码 |
| expired | int | 过期字段,1为过期,需修改密码 |
| disable | int | 不可用字段,1为不可用,禁用 |
| varchar | 邮箱,可不需要 |
/*
账号表
*/

CREATE TABLE SYS_USER (
  USERNAME VARCHAR(30) PRIMARY KEY,
  PASSWORD VARCHAR(64) NOT NULL,
  EMAIL    VARCHAR(50),
  ADDRESS  VARCHAR(100),
  AGE      INT,
  EXPIRED INT,
  DISABLE INT
);

/*HealerJean456*/
INSERT INTO SYS_USER VALUES ('HealerJean', '40e5fd27a2f9db33d397d11617c2098b', 'mxzdhealer@gmail.com', '山西忻州', 24, 0, 0);
/*123*/
INSERT INTO SYS_USER VALUES ('admin', '202cb962ac59075b964b07152d234b70', 'huang.wenbin@foxmail.com', '广州天河', 24, 0, 0);
/*12345678*/
INSERT INTO SYS_USER VALUES ('zhangsan', '25d55ad283aa400af464c76d713c07ad', 'zhangsan@foxmail.com', '广州越秀', 26, 0, 0);
/*1234*/
/*锁定用户*/
INSERT INTO SYS_USER VALUES('zhaosi','81dc9bdb52d04dc20036dbd8313ed055', 'zhaosi@foxmail.com', '广州海珠', 25, 0 , 1);
/*12345*/
/*不可用*/
INSERT INTO SYS_USER VALUES('wangwu','827ccb0eea8a706c4c34a16891f84e7b', 'wangwu@foxmail.com', '广州番禺', 27, 1 , 0);
3、在sso-server中添加配置,进行密码的验证
# 1、MD5 密码直接校验
#Query Database Authentication 数据库查询校验用户名开始
#查询账号密码sql,必须包含密码字段,
# 这里可以使用用户名或者邮箱来进行验证,根据数据字段如果是用户名则为username 邮箱则为email
cas.authn.jdbc.query[0].sql=select * from sys_user where email=?
#指定上面的sql查询字段名(必须)
cas.authn.jdbc.query[0].fieldPassword=password
#指定过期字段,1为过期,若过期不可用
cas.authn.jdbc.query[0].fieldExpired=expired
#为不可用字段段,1为不可用,需要修改密码
cas.authn.jdbc.query[0].fieldDisabled=disabled
#数据库方言hibernate的知识
cas.authn.jdbc.query[0].dialect=org.hibernate.dialect.MySQL5Dialect
#数据库驱动
cas.authn.jdbc.query[0].driverClass=com.mysql.jdbc.Driver
#数据库连接
cas.authn.jdbc.query[0].url=jdbc:mysql://localhost:3306/casnew?useUnicode=true&characterEncoding=UTF-8&autoReconnect=true&useSSL=true
#数据库用户名
cas.authn.jdbc.query[0].user=root
#数据库密码
cas.authn.jdbc.query[0].password=123456
#默认加密策略,通过encodingAlgorithm来指定算法,默认NONE不加密,可以自定义密码认证,比如ddkj就是写了一个自定义的认证
cas.authn.jdbc.query[0].passwordEncoder.type=DEFAULT
cas.authn.jdbc.query[0].passwordEncoder.characterEncoding=UTF-8
cas.authn.jdbc.query[0].passwordEncoder.encodingAlgorithm=MD5
#Query Database Authentication 数据库查询校验用户名结束
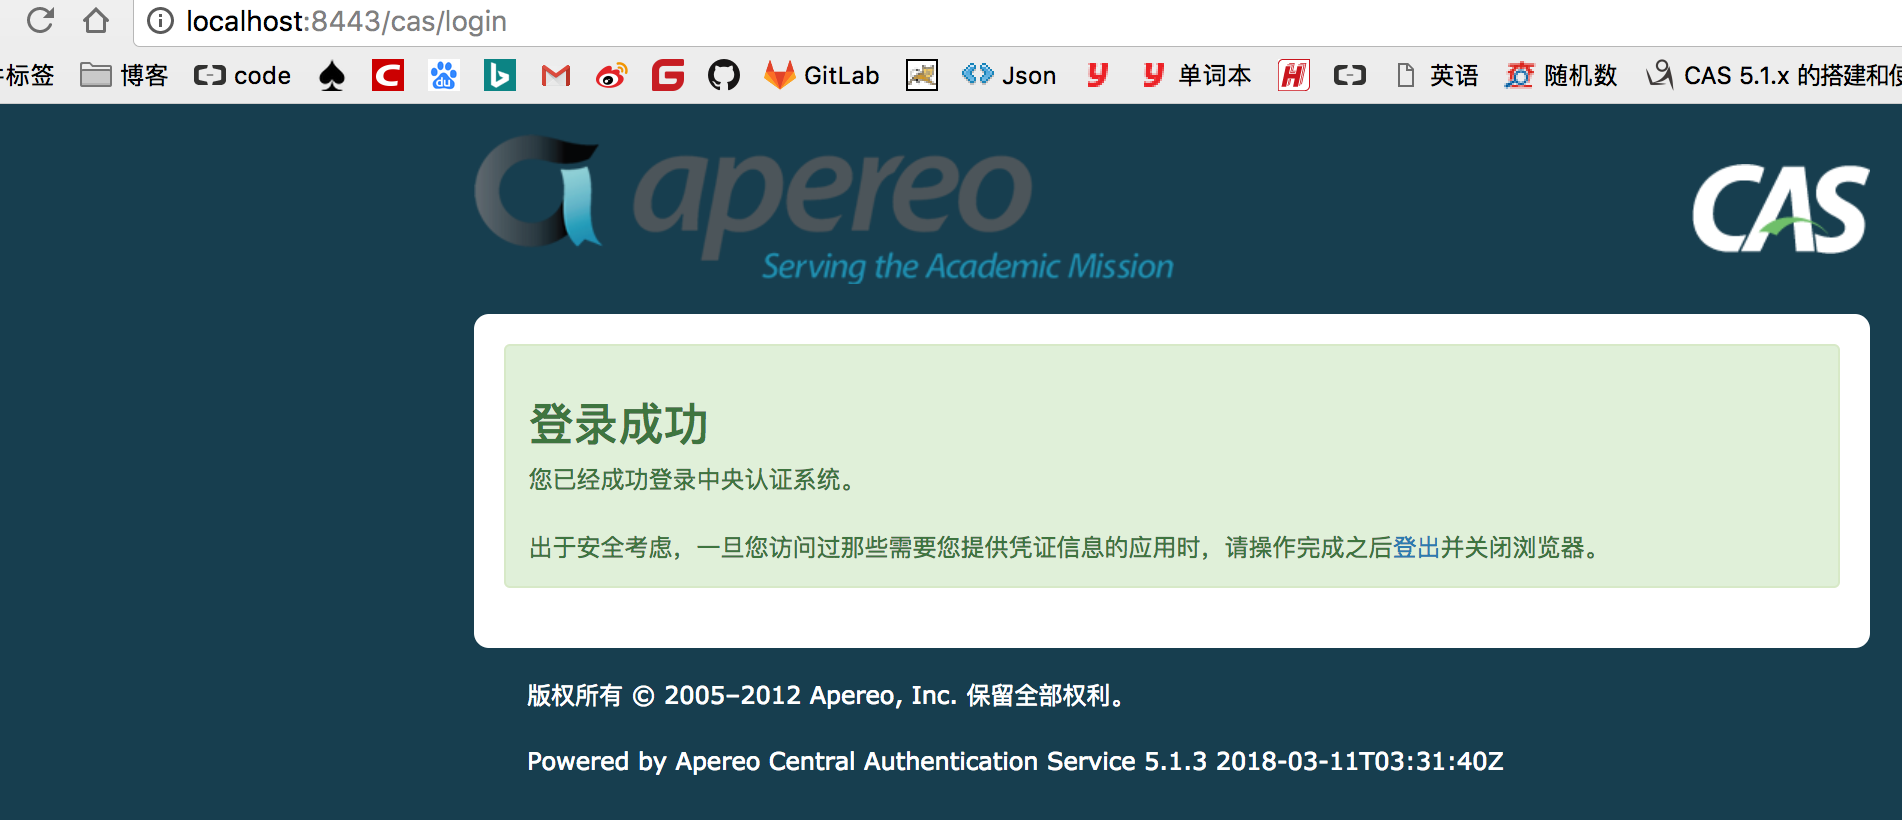
4、开始MD5加密测试吧,朋友们,MD5加密测试吧,朋友们
sudo ./build.sh
使用用户名和密码mxzdhealer@gmail.com/HealerJean456

3、使用自定义的java类进行密码的验证
1、自定义的密码校验类
package com.hlj.sso.server.EncoderUtils;

import com.hlj.sso.server.Utils.MD5Util;
import org.apache.commons.lang3.StringUtils;
import org.slf4j.Logger;
import org.slf4j.LoggerFactory;
import org.springframework.security.crypto.password.PasswordEncoder;

/**
 * 自定义密码认证
 *
 * @author chuan.ma
 * @since 2017/6/22
 */
public class CustomPasswordEncoder implements PasswordEncoder {

    private static final Logger LOGGER = LoggerFactory.getLogger(CustomPasswordEncoder.class);

    //前台传来的明文密码会进入这里。然后取得加密密码
    @Override
    public String encode(CharSequence password) {
        if (password == null) {
            return null;
        } else {
            return this.encodePassword(password.toString());
        }
    }
    //密码校验,匹配
    @Override
    public boolean matches(CharSequence rawPassword, String encodedPassword) {
        String encodedRawPassword = StringUtils.isNotBlank(rawPassword)?this.encode(rawPassword.toString()):null;
        return StringUtils.equals(encodedRawPassword, encodedPassword);
    }

    // 这部分则为通过前台传来的明文密码根据自己的东西返回获取数据库中的加密密码的格式,
    // 用于matchs方法中进行比较
    private String encodePassword(String password) {
        return MD5Util.string2MD5(password);
    }
}
2、配置文件中进行配置这个密码校验类,而不是直接写死MD5,但是也有局限性,针对随机盐,我们从这个校验类中查不到盐的值。后面会讲
# 2、使用自定义类进行密码校验
#数据库连接
cas.authn.jdbc.query[0].url=jdbc:mysql://localhost:3306/casnew?useUnicode=true&characterEncoding=UTF-8&autoReconnect=true&useSSL=true
#数据库用户名
cas.authn.jdbc.query[0].user=root
#数据库密码
cas.authn.jdbc.query[0].password=123456
## 这里可以添加多个验证条件,比如 是不是可用,直接 and expired =1 表示过期了
cas.authn.jdbc.query[0].sql=select password from sys_user where email=?
cas.authn.jdbc.query[0].fieldPassword=password
# 这里就是最重要的一个,用来验证密码的
cas.authn.jdbc.query[0].passwordEncoder.type=com.hlj.sso.server.EncoderUtils.CustomPasswordEncoder
cas.authn.jdbc.query[0].dialect=org.hibernate.dialect.MySQL5Dialect
cas.authn.jdbc.query[0].ddlAuto=none
cas.authn.jdbc.query[0].driverClass=com.mysql.jdbc.Driver
cas.authn.jdbc.query[0].leakThreshold=10
cas.authn.jdbc.query[0].propagationBehaviorName=PROPAGATION_REQUIRED
cas.authn.jdbc.query[0].batchSize=1
cas.authn.jdbc.query[0].healthQuery=SELECT 1
cas.authn.jdbc.query[0].failFast=true
3、使用邮箱和密码登录验证成功
3、使用固定盐登录(固定盐)
固定盐:根据某一个值生成的确定的盐,比如这里就是根据邮箱生成的固定的盐。
1、加入依赖
<!--加了依赖即将支持三种校验方式,包括文件存储用户校验器、拒绝用户校验器、shiro校验器-->
<dependency>
    <groupId>org.apereo.cas</groupId>
    <artifactId>cas-server-support-generic</artifactId>
    <version>${cas.version}</version>
</dependency>
2、固定盐生成类
这个类我放到test包下,不知道为什么在main下包不能引入。如果有知道为什么的请帮忙留意下,留言求告知
package com.hlj.sso.server;

import org.apache.shiro.crypto.hash.ConfigurableHashService;
import org.apache.shiro.crypto.hash.DefaultHashService;
import org.apache.shiro.crypto.hash.HashRequest;
import org.apache.shiro.util.ByteSource;
import org.junit.Test;


public class PasswordSaltTest {
    private String staticSalt = ".";
    private String algorithmName = "MD5";
    private String encodedPassword = "123";
    private String dynaSalt = "admin_en";

    @Test
    public void test() throws Exception {
        ConfigurableHashService hashService = new DefaultHashService();
        hashService.setPrivateSalt(ByteSource.Util.bytes(this.staticSalt));
        hashService.setHashAlgorithmName(this.algorithmName);
        hashService.setHashIterations(2);
        HashRequest request = new HashRequest.Builder()
                .setSalt(dynaSalt)
                .setSource(encodedPassword)
                .build();
        String res =  hashService.computeHash(request).toHex();
        System.out.println(res);
    }
}
3、创建数据库表和添加测试数据
/*
账号加盐表
*/
CREATE TABLE SYS_USER_ENCODE (
  USERNAME VARCHAR(30) PRIMARY KEY,
  PASSWORD VARCHAR(64) NOT NULL,
  EMAIL    VARCHAR(50),
  ADDRESS  VARCHAR(100),
  AGE      INT,
  EXPIRED INT,
  DISABLED INT
);


---加盐数据
/*123  可以采用PasswordSaltTest输出值*/
INSERT INTO SYS_USER_ENCODE VALUES ('admin_en', 'bfb194d5bd84a5fc77c1d303aefd36c3', 'huang.wenbin@foxmail.com', '江门蓬江', 24, 0, 0);
INSERT INTO SYS_USER_ENCODE VALUES ('zhangsan_en', '68ae075edf004353a0403ee681e45056',  'zhangsan@foxmail.com', '深圳宝安', 21, 0, 0);
INSERT INTO SYS_USER_ENCODE VALUES ('zhaosi_en', 'd66108d0409f68af538301b637f13a18',  'zhaosi@foxmail.com', '清远清新', 20, 0, 1);
INSERT INTO SYS_USER_ENCODE VALUES ('wangwu_en', '44b907d6fee23a552348eabf5fcf1ac7',  'wangwu@foxmail.com', '佛山顺德', 19, 1, 0);
4、sso-server中添加配置,进行加盐的校验
#4、加盐处理
#Encode Database Authentication 开始
#加密次数
cas.authn.jdbc.encode[0].numberOfIterations=2
#该列名的值可替代上面的值,但对密码加密时必须取该值进行处理
cas.authn.jdbc.encode[0].numberOfIterationsFieldName=
# 盐值固定列
cas.authn.jdbc.encode[0].saltFieldName=username
#静态盐值
cas.authn.jdbc.encode[0].staticSalt=.
cas.authn.jdbc.encode[0].sql=select * from sys_user_encode where username=?
#对处理盐值后的算法
cas.authn.jdbc.encode[0].algorithmName=MD5
cas.authn.jdbc.encode[0].passwordFieldName=password
cas.authn.jdbc.encode[0].expiredFieldName=expired
cas.authn.jdbc.encode[0].disabledFieldName=disabled
#数据库连接
cas.authn.jdbc.encode[0].url=jdbc:mysql://localhost:3306/casnew?useUnicode=true&characterEncoding=UTF-8&autoReconnect=true&useSSL=true
cas.authn.jdbc.encode[0].dialect=org.hibernate.dialect.MySQL5Dialect
cas.authn.jdbc.encode[0].driverClass=com.mysql.jdbc.Driver
cas.authn.jdbc.encode[0].user=root
cas.authn.jdbc.encode[0].password=123456
4、开始加盐测试吧,朋友们,MD5加密测试吧,朋友们
这次我上面使用的是用户名加密,所以用户名和密码username和password
4、rest密码校验,随机盐校验
这个是可以使用随机盐的了,因为rest测试需要重新开启一个端口。也就是相当于重新开启一个项目。这里我新建了一个工程,sso-server-rest。端口为8888
1、通过总司令新建Moudule ,新建springBoot工程。
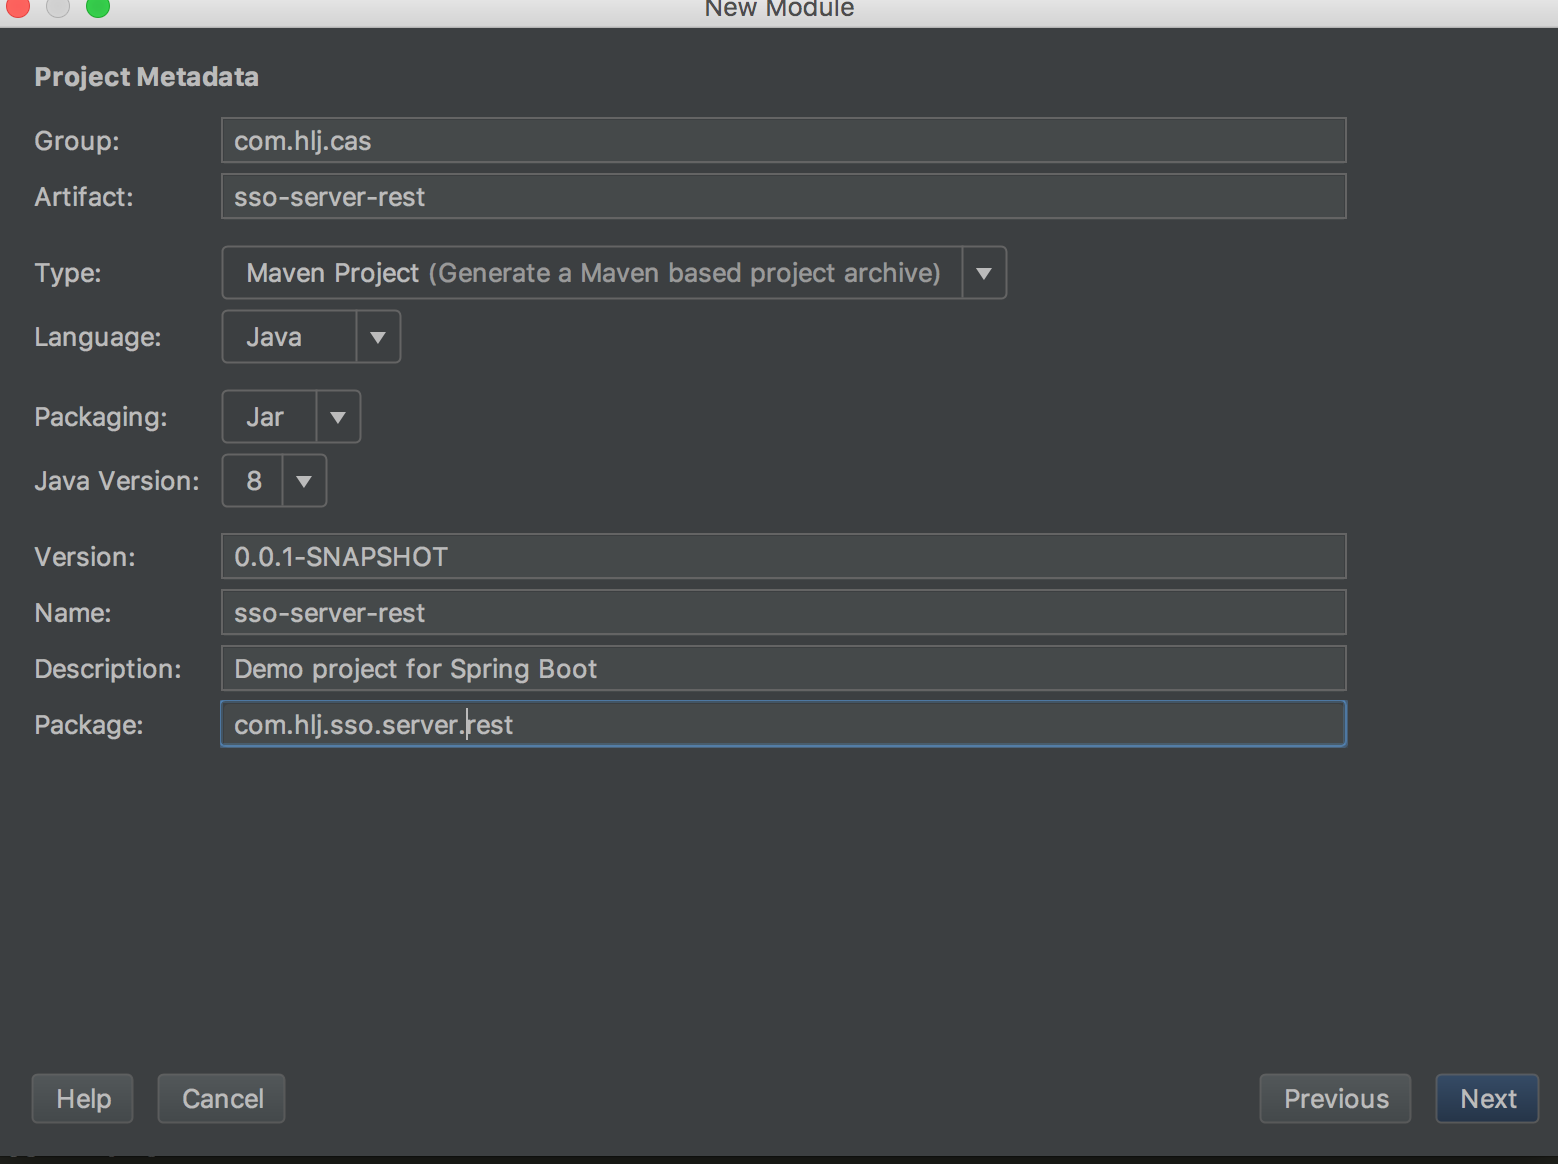
添加web和jpa 下面忘记写mysql了记得写上哦,依赖
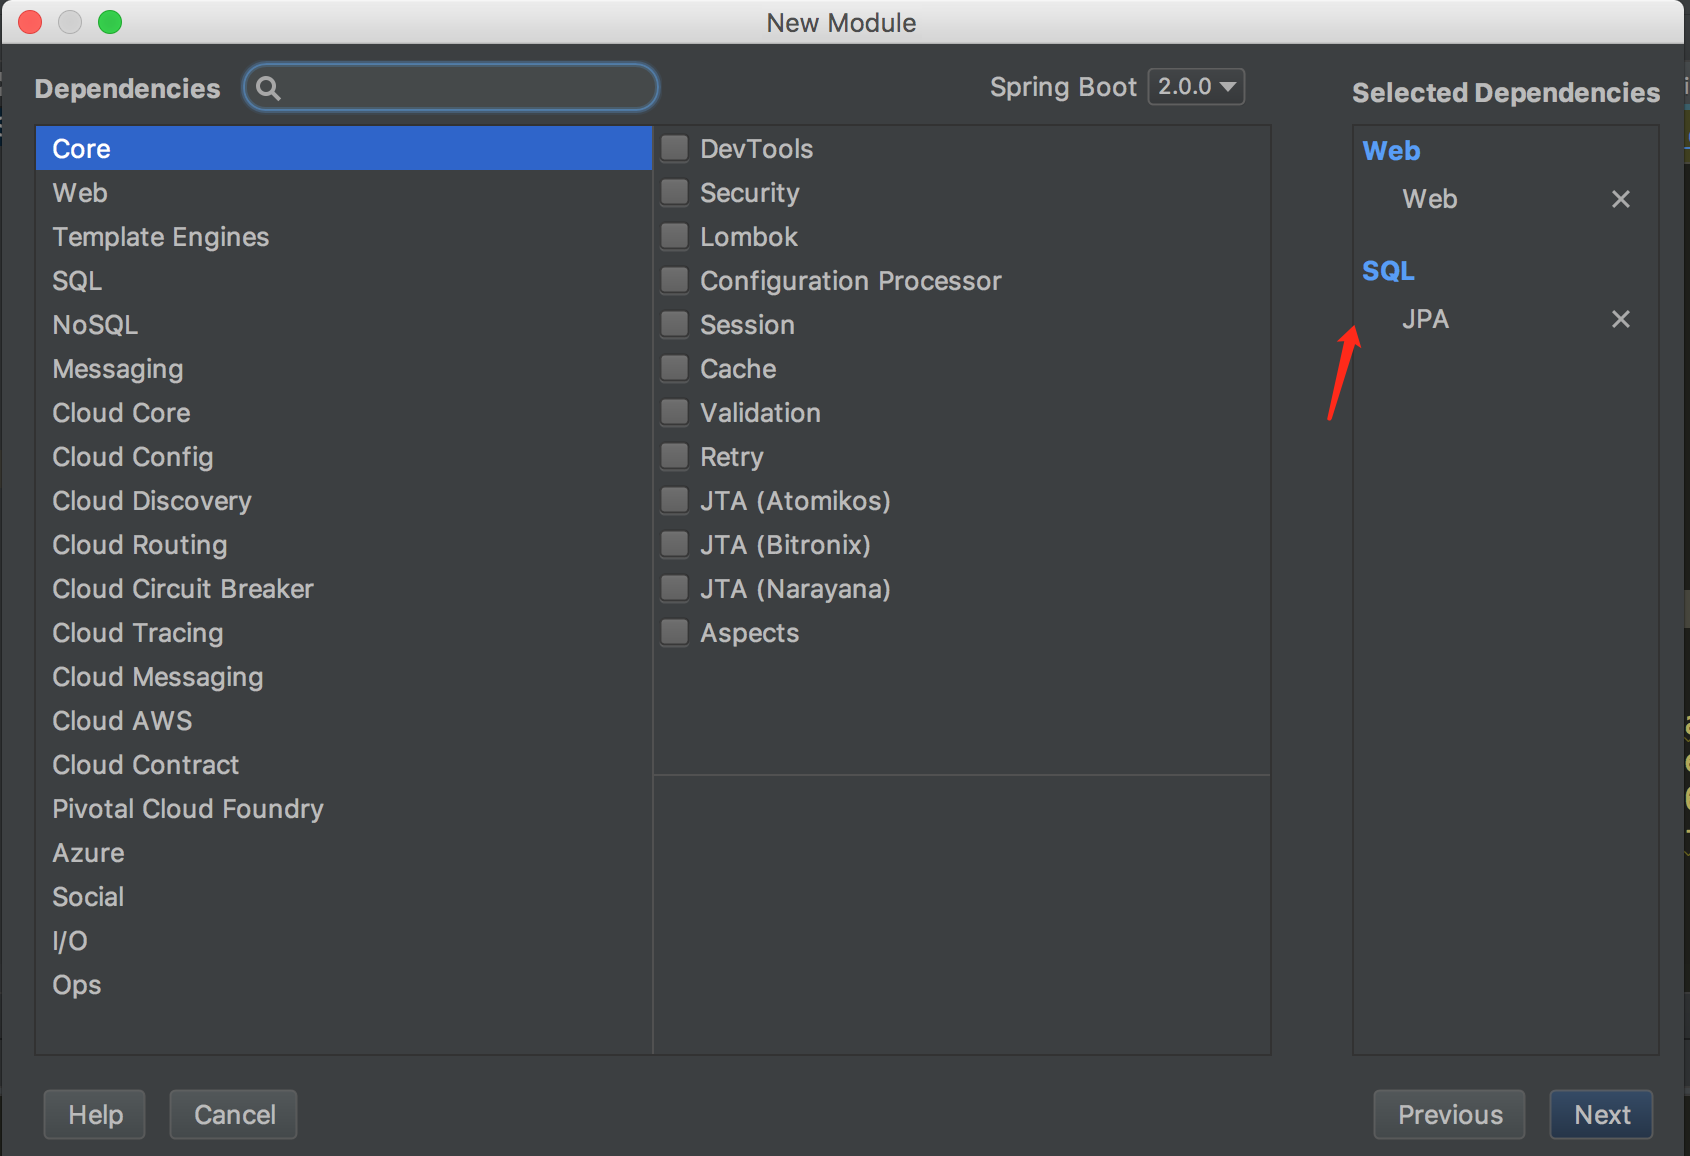
3、总司令com-hlj-cas进行聚合,但并没有继承总司令。和ddkj有点像
<modules>
    <module>sso-server</module>
    <module>sso-server-rest</module>
</modules>
4、介绍下rest的验证模式
解释:cas明确规定如下:
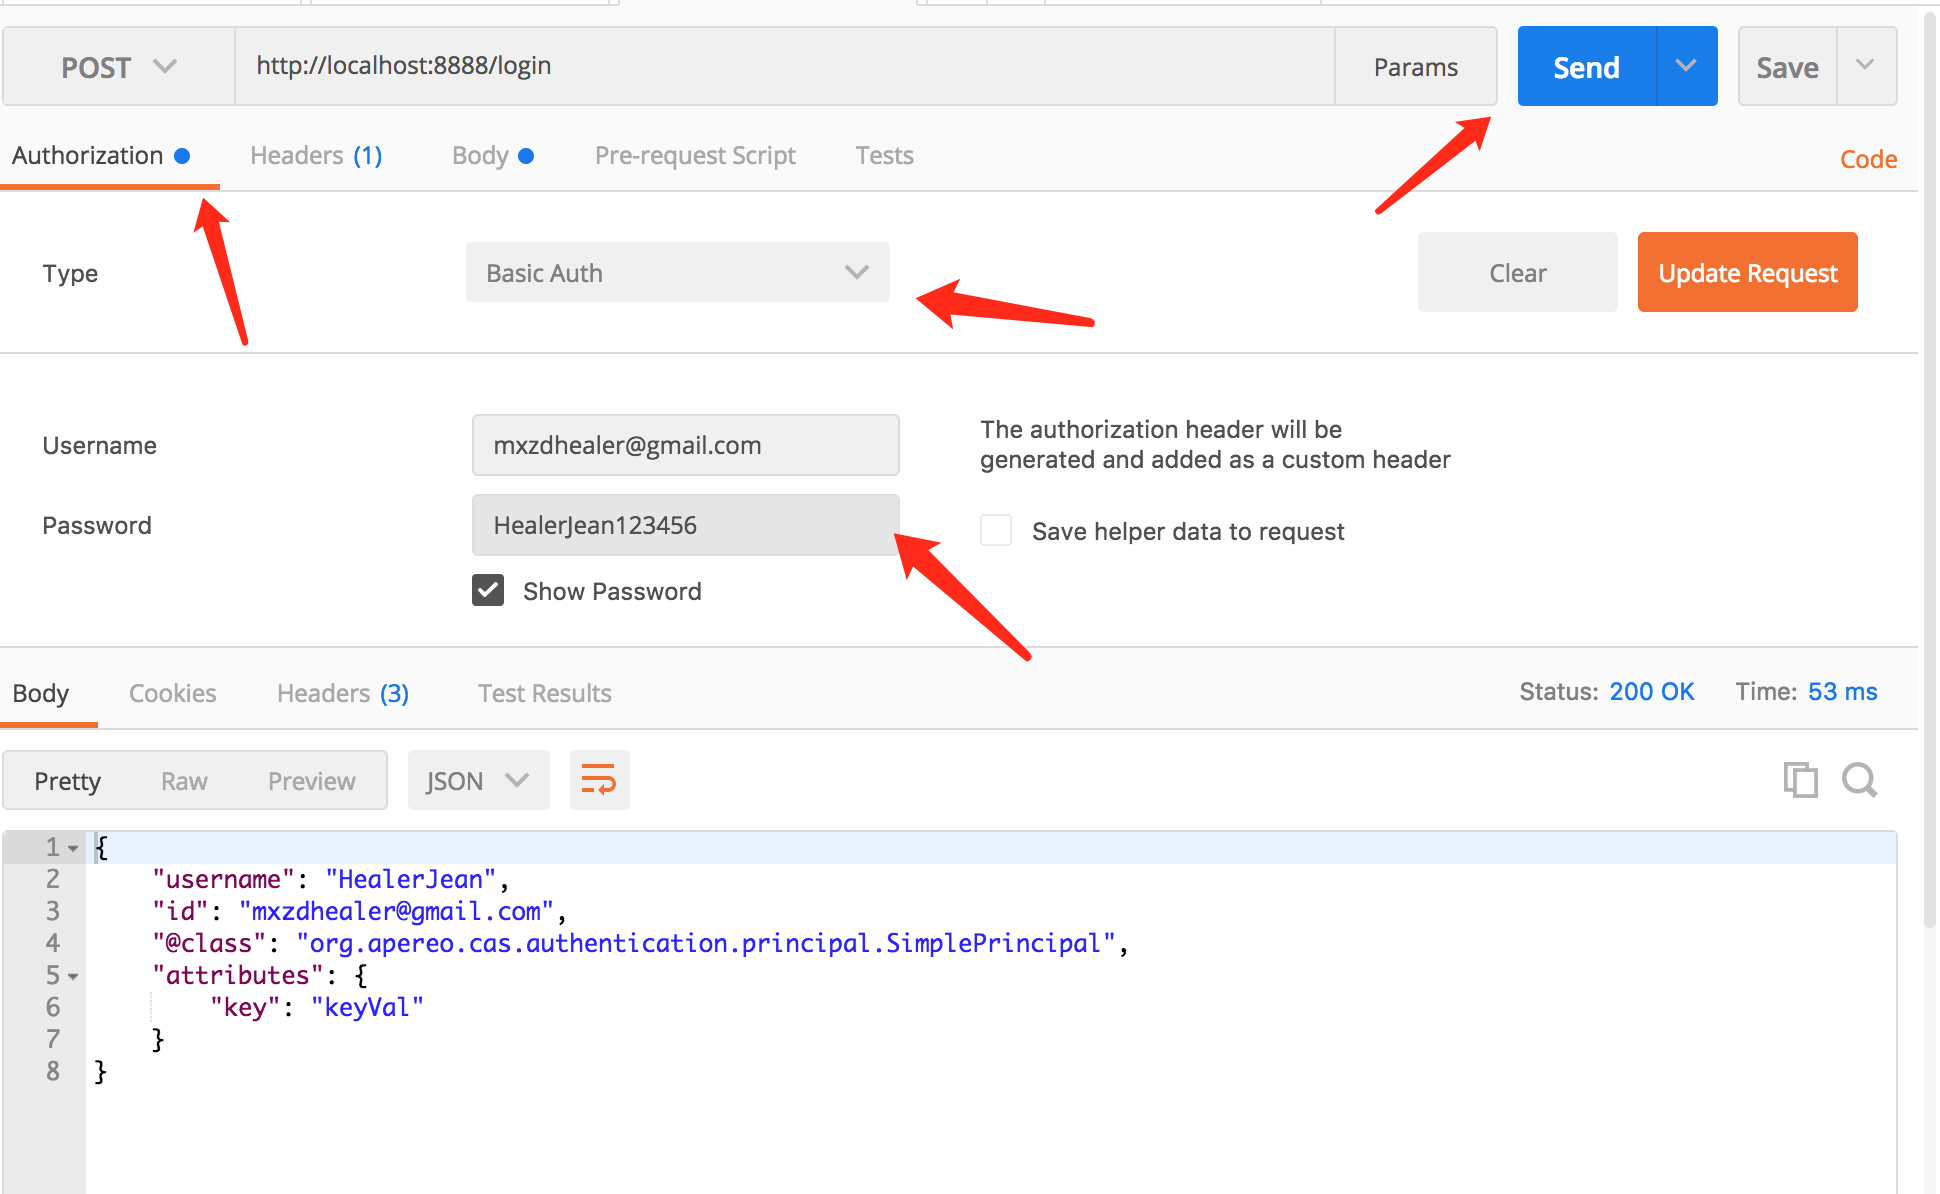
1、cas 服务端会通过post请求,并且把用户信息以”用户名:密码”进行Base64编码放在authorization请求头中
2、返回200状态码并且格式为如下
{
    "id": "mxzdhealer@gmail.com",
    "@class": "org.apereo.cas.authentication.principal.SimplePrincipal",
    "attributes": {
        "key": "keyVal"
    }
}
是成功的; 返回状态码403用户不可用;404账号不存在;423账户被锁定;428过期;其他登录失败
5、sso-serveer中添加rest配置和测试生成随机盐的shiro 依赖
1、依赖
<!--restj认证-->
<dependency>
    <groupId>org.apereo.cas</groupId>
    <artifactId>cas-server-support-rest-authentication</artifactId>
    <version>${cas.version}</version>
</dependency>

<!--仅用于产生随机盐-->
<dependency>
	<groupId>org.apache.shiro</groupId>
	<artifactId>shiro-spring</artifactId>
	<version>1.4.0</version>
</dependency>
2、配置
#REST 认证开始
cas.authn.rest.uri=http://localhost:8888/login
#传输过程不适用md5加密,所以注释掉了,否则需要到rest中再进行解密,太麻烦了没有必要,默认为none
#cas.authn.rest.passwordEncoder.type=DEFAULT
#cas.authn.rest.passwordEncoder.characterEncoding=UTF-8
#cas.authn.rest.passwordEncoder.encodingAlgorithm=MD5
#REST 结束
6、制作随机盐加密类
package com.hlj.sso.server.Utils;

import org.apache.shiro.crypto.SecureRandomNumberGenerator;
import org.apache.shiro.crypto.hash.Md5Hash;

public class RestSaltUtils {


    /**
     * 产生随机盐
     * @param args
     */
    public String salt(String password) {
        SecureRandomNumberGenerator secureRandomNumberGenerator = new SecureRandomNumberGenerator();
        String salt = secureRandomNumberGenerator.nextBytes().toHex();
        //对密码加密后,将加密后的密码和盐存入对象
        password = new Md5Hash(password, salt).toString();
        System.out.println(password);

        return password;
    }

    public static void main(String[] args) {
        String password ="HealerJean456";
        RestSaltUtils restSaltUtils = new RestSaltUtils();
        restSaltUtils.salt(password);
    }

}
7、创建数据库表和添加数据
/*
账号表
*/


CREATE TABLE `sys_user_rest_salt` (
  `id` bigint(20) NOT NULL AUTO_INCREMENT,
  `address` varchar(255) COLLATE utf8_bin DEFAULT NULL,
  `age` int(11) NOT NULL,
  `disable` int(11) NOT NULL,
  `email` varchar(255) COLLATE utf8_bin DEFAULT NULL,
  `expired` int(11) NOT NULL,
  `password` varchar(255) COLLATE utf8_bin DEFAULT NULL,
  `salt` varchar(255) COLLATE utf8_bin DEFAULT NULL,
  `username` varchar(255) COLLATE utf8_bin DEFAULT NULL,
  `locked` int(11) NOT NULL,
  PRIMARY KEY (`id`)
)


INSERT INTO `sys_user_rest_salt` VALUES
('1', '山西忻州', '24', '0', 'mxzdhealer@gmail.com', '0', '971c4fef68430b0de3b91203cd27fd6a', 'aa6abe8f4c94beae41f94c62326500ca', 'HealerJean', '0'),
('2', '北京西城', '24', '0', 'huang.wenbin@gmail.com', '0', '971c4fef68430b0de3b91203cd27fd6a', 'aa6abe8f4c94beae41f94c62326500ca', 'admin2 ', '0'),
/*锁定用户*/
('3', '江苏南京', '24', '1', 'zhangsan@gmail.com', '0', '971c4fef68430b0de3b91203cd27fd6a', 'aa6abe8f4c94beae41f94c62326500ca', 'zhangsan', '0'),
/*不可用*/
('4', '浙江杭州', '24', '0', 'zhaosi@gmail.com', '1', '971c4fef68430b0de3b91203cd27fd6a', 'aa6abe8f4c94beae41f94c62326500ca', 'zhaosi', '0');
8、sso-server-rest中添加代码
1、创建实体类
package com.hlj.sso.server.rest.bean;

import javax.persistence.*;

@Entity
@Table(name = "SYS_USER_REST_SALT")
public class SysUserRestSalt {

    @Id
    @GeneratedValue(strategy = GenerationType.IDENTITY)
    private Long id;

    private String username;

    private String salt;

    private String password;

    private  String email;

    private String address;
    private int age;

    //用户是否不可用,1不可用
    private int disable ;

    //用户是否过期,1。过期
    private int expired;

    private int locked;

    public SysUserRestSalt() {
    }

    public Long getId() {
        return id;
    }

    public void setId(Long id) {
        this.id = id;
    }

	…………………………
2、返回的实体data
1、解释:@JsonProperty @JsonProperty不仅仅是在序列化的时候有用,反序列化的时候也有用,比如有些接口返回的是json字符串,命名又不是标准的驼峰形式,在映射成对象的时候,将类的属性上加上@JsonProperty注解,里面写上返回的json串对应的名字
package com.hlj.sso.server.rest.BeanData;

import com.fasterxml.jackson.annotation.JsonIgnore;
import com.fasterxml.jackson.annotation.JsonProperty;

import javax.validation.constraints.NotNull;
import java.util.HashMap;
import java.util.Map;

public class SysUserRestSaltData {


    //@JsonProperty @JsonProperty不仅仅是在序列化的时候有用,
    // 反序列化的时候也有用,比如有些接口返回的是json字符串,
    // 命名又不是标准的驼峰形式,在映射成对象的时候,
    // 将类的属性上加上@JsonProperty注解,里面写上返回的json串对应的名字

    @JsonProperty("id")
    private  String email;

    @JsonProperty("@class")
    //需要返回实现org.apereo.cas.authentication.principal.Principal的类名接口
    private String clazz = "org.apereo.cas.authentication.principal.SimplePrincipal";

    @JsonProperty("attributes")
    private Map<String, Object> attributes = new HashMap<>();

    @JsonIgnore
    @NotNull
    private String username;

    @JsonIgnore
    @NotNull
    private String password;

    @JsonIgnore
    //用户是否不可用
    private boolean disable = false;
    @JsonIgnore
    //用户是否过期
    private boolean expired = false;

    @JsonIgnore
    //是否锁定
    private boolean locked = false;

    @JsonIgnore
    private Long id;

    @JsonIgnore
    private String salt;


    @JsonIgnore
    private String address;

    @JsonIgnore
    private int age;


    public boolean isLocked() {
        return locked;
    }

    public SysUserRestSaltData setLocked(int locked) {
        if(locked==1){
            this.locked = true;
        }
        return this;
    }

    public boolean isDisable() {
        return disable;
    }

    public SysUserRestSaltData setDisable(int disable) {
        if(disable==1){
            this.disable = true;
        }
        return this;
    }

    public boolean isExpired() {
        return expired;
    }

    public SysUserRestSaltData setExpired(int expired) {
        if(expired==1){
            this.expired = true;
        }        return this;
    }

    public String getPassword() {
        return password;
    }

    public SysUserRestSaltData setPassword(String password) {
        this.password = password;
        return this;
    }

    public String getUsername() {
        return username;
    }

    public SysUserRestSaltData setUsername(String username) {
        this.username = username;
        return this;
    }

    public String getClazz() {
        return clazz;
    }

    public Map<String, Object> getAttributes() {
        return attributes;
    }

    public SysUserRestSaltData setAttributes(Map<String, Object> attributes) {
        this.attributes = attributes;
        return this;
    }


    public Long getId() {
        return id;
    }

    public SysUserRestSaltData setId(Long id) {
        this.id = id;
        return this;

    }

    public String getSalt() {
        return salt;
    }

    public SysUserRestSaltData setSalt(String salt) {
        this.salt = salt;
        return this;

    }

    public String getEmail() {
        return email;
    }

    public SysUserRestSaltData setEmail(String email) {
        this.email = email;
        return this;

    }

    public String getAddress() {
        return address;
    }

    public SysUserRestSaltData setAddress(String address) {
        this.address = address;
        return this;
    }

    public int getAge() {
        return age;
    }

    public SysUserRestSaltData setAge(int age) {
        this.age = age;
        return this;
    }


    @JsonIgnore
    public SysUserRestSaltData addAttribute(String key, Object val) {
        getAttributes().put(key, val);
        return this;
    }

}
3、controller开始进行登录验证。
这里就设计到了通过邮箱找到盐,再通过盐制作为密码,和数据库中进行比较。所以还需要pom中导入随机眼的shiro jar包
<!--仅用于产生随机盐-->
<dependency>
	<groupId>org.apache.shiro</groupId>
	<artifactId>shiro-spring</artifactId>
	<version>1.4.0</version>
</dependency>
package  com.hlj.sso.server.rest.controller;

import com.hlj.sso.server.rest.BeanData.SysUserRestSaltData;
import com.hlj.sso.server.rest.service.SysUserRestSaltService;
import org.apache.shiro.crypto.hash.Md5Hash;
import org.slf4j.Logger;
import org.slf4j.LoggerFactory;
import org.springframework.beans.factory.annotation.Autowired;
import org.springframework.http.HttpHeaders;
import org.springframework.http.HttpStatus;
import org.springframework.http.ResponseEntity;
import org.springframework.util.Base64Utils;
import org.springframework.web.bind.annotation.PostMapping;
import org.springframework.web.bind.annotation.RequestHeader;
import org.springframework.web.bind.annotation.RestController;

import java.io.UnsupportedEncodingException;

/**
 * @Description
 * @Author HealerJean
 * @Date   2018/3/11 下午1:15.
 */

@RestController
public class AuthUserController {
    private static final Logger LOGGER = LoggerFactory.getLogger(AuthUserController.class);

    @Autowired
    private SysUserRestSaltService sysUserRestSaltService;


/**
      1. cas 服务端会通过post请求,并且把用户信息以"用户名:密码"进行Base64编码放在authorization请求头中
  2. 返回200状态码并且格式为
  {
"@class":"org.apereo.cas.authentication.principal.SimplePrincipal",
  "id":"casuser",
   "attributes":{}
      }
      是成功的
 2. 返回状态码
 . 403用户不可用;
 . 404账号不存在;
 . 423账户被锁定;
 . 428过期;其他登录失败


 */
    @PostMapping("/login")
    public Object login(@RequestHeader HttpHeaders httpHeaders) {
        LOGGER.info("Rest api login.");
        LOGGER.debug("request headers: {}", httpHeaders);
        SysUserRestSaltData user = null;
        try {
            //通过服务端传来的用户名和密码
            UserTemp userTemp = obtainUserFormHeader(httpHeaders);

            //尝试查找用户库是否存在
             user= sysUserRestSaltService.findByEmail(userTemp.username);


            if (user.getId() != null) {
                String password = new Md5Hash(userTemp.password, user.getSalt()).toString();
                if (!user.getPassword().equals(password)) {
                    //密码不匹配
                    return new ResponseEntity(HttpStatus.BAD_REQUEST);
                }
                if (user.isDisable()) {
                    //禁用 403,表示以后也不能用了。其实它和锁定差不多
                    return new ResponseEntity(HttpStatus.FORBIDDEN);
                }
                if (user.isLocked()) {
                    //锁定 423
                    return new ResponseEntity(HttpStatus.LOCKED);
                }
                if (user.isExpired()) {
                    //过期 428
                    return new ResponseEntity(HttpStatus.PRECONDITION_REQUIRED);
                }
            } else {
                //不存在 404
                return new ResponseEntity(HttpStatus.NOT_FOUND);
            }
        } catch (UnsupportedEncodingException e) {
            LOGGER.error("", e);
            new ResponseEntity(HttpStatus.BAD_REQUEST);
        }
        LOGGER.info("[{}] login is ok", user.getUsername());
        //成功返回json
        user.addAttribute("key", "keyVal");
        return user;
    }

    /**
     * 根据请求头获取用户名及密码
     *
     * @param httpHeaders
     * @return
     * @throws UnsupportedEncodingException
     */
    private UserTemp obtainUserFormHeader(HttpHeaders httpHeaders) throws UnsupportedEncodingException {

        //根据官方文档,当请求过来时,会通过把用户信息放在请求头authorization中,并且通过Basic认证方式加密
        String authorization = httpHeaders.getFirst("authorization");//将得到 Basic Base64(用户名:密码)
        String baseCredentials = authorization.split(" ")[1];
        String usernamePassword = new String(Base64Utils.decodeFromString(baseCredentials), "UTF-8");//用户名:密码
        LOGGER.debug("login user: {}", usernamePassword);
        String credentials[] = usernamePassword.split(":");
        return new UserTemp(credentials[0], credentials[1]);
    }

    /**
     * 解析请求过来的用户
     */
    private class UserTemp {
        private String username;
        private String password;

        public UserTemp(String username, String password) {

            this.username = username;
            this.password = password;
        }

    }

}
4、service中的验证
这里需要注意的是,我省略了jpa和repository等的简单创建
package com.hlj.sso.server.rest.service.impl;

import com.hlj.sso.server.rest.BeanData.SysUserRestSaltData;
import com.hlj.sso.server.rest.Repository.SysUserRestSaltRepository;
import com.hlj.sso.server.rest.bean.SysUserRestSalt;
import com.hlj.sso.server.rest.service.SysUserRestSaltService;
import org.springframework.beans.factory.annotation.Autowired;
import org.springframework.stereotype.Service;

@Service
public class SysUserRestSaltServiceImpl implements SysUserRestSaltService{

    @Autowired
    private SysUserRestSaltRepository sysUserRestSaltRepository;

    @Override
    public SysUserRestSaltData findByEmail(String email) {
        SysUserRestSalt sysUserRestSalt =sysUserRestSaltRepository.findByEmail(email);

        SysUserRestSaltData sysUserRestSaltData = new SysUserRestSaltData();
       if(sysUserRestSalt!=null) {
           sysUserRestSaltData.setUsername(sysUserRestSalt.getUsername());
           sysUserRestSaltData.setEmail(sysUserRestSalt.getEmail());
           sysUserRestSaltData.setId(sysUserRestSalt.getId());
           sysUserRestSaltData.setLocked(sysUserRestSalt.getLocked());
           sysUserRestSaltData.setDisable(sysUserRestSalt.getDisable());
           sysUserRestSaltData.setExpired(sysUserRestSalt.getExpired());
           sysUserRestSaltData.setPassword(sysUserRestSalt.getPassword());
           sysUserRestSaltData.setSalt(sysUserRestSalt.getSalt());
           //下面这两个用到,可有可没有
           sysUserRestSaltData.setAddress(sysUserRestSalt.getAddress());
           sysUserRestSaltData.setAge(sysUserRestSalt.getAge());

       }
        return sysUserRestSaltData;
    }
}
9、使用postman进行测试
10、启动sso-server和sso-server-rest进行登录验证,使用email和密码登录
1、正确的账户 mxzdhealer@gmail.com HealerJean456
2、禁用的的账户 zhangsan@gmail.com HealerJean456
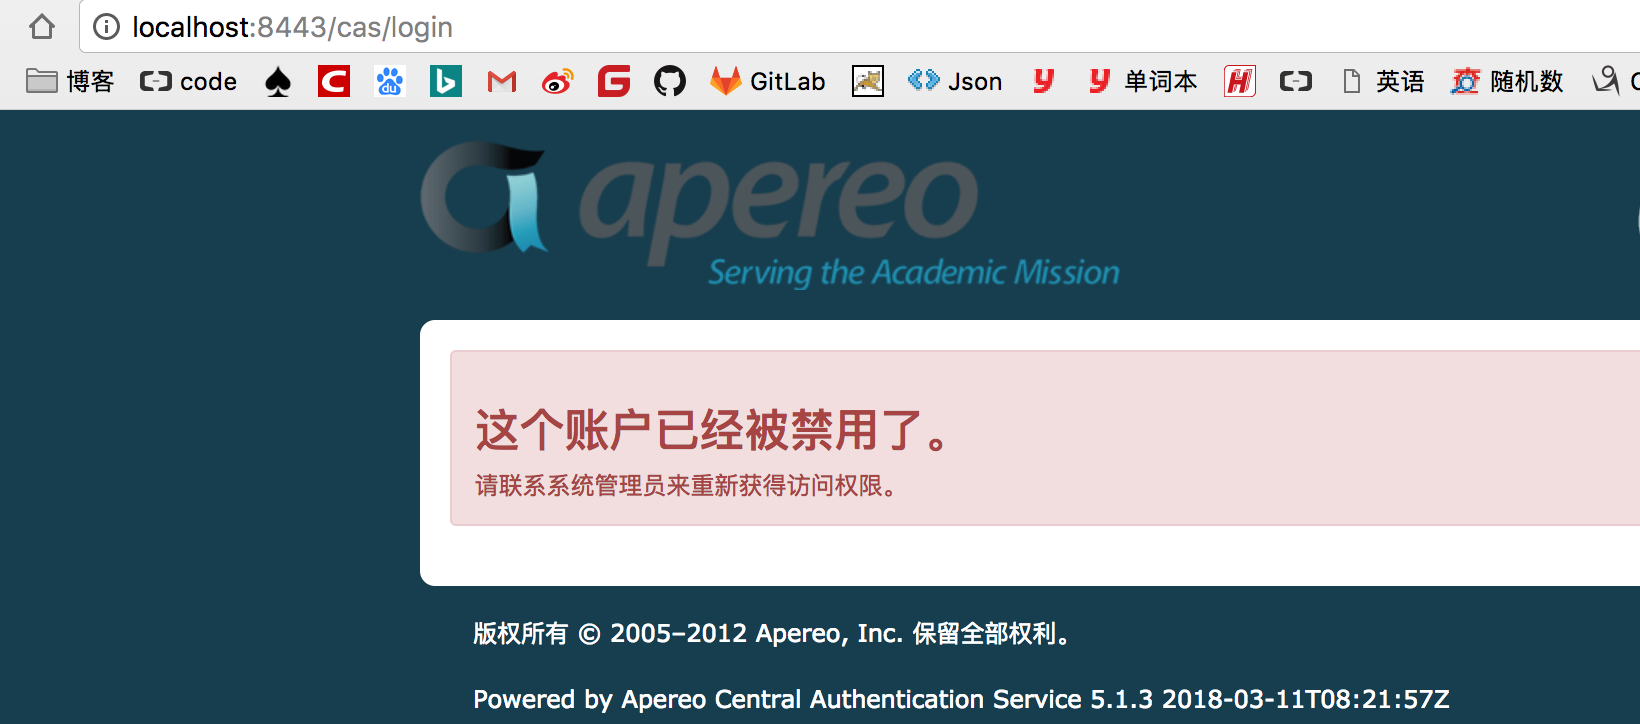
3、锁定的账户 huang.wenbin@gmail.com HealerJean456
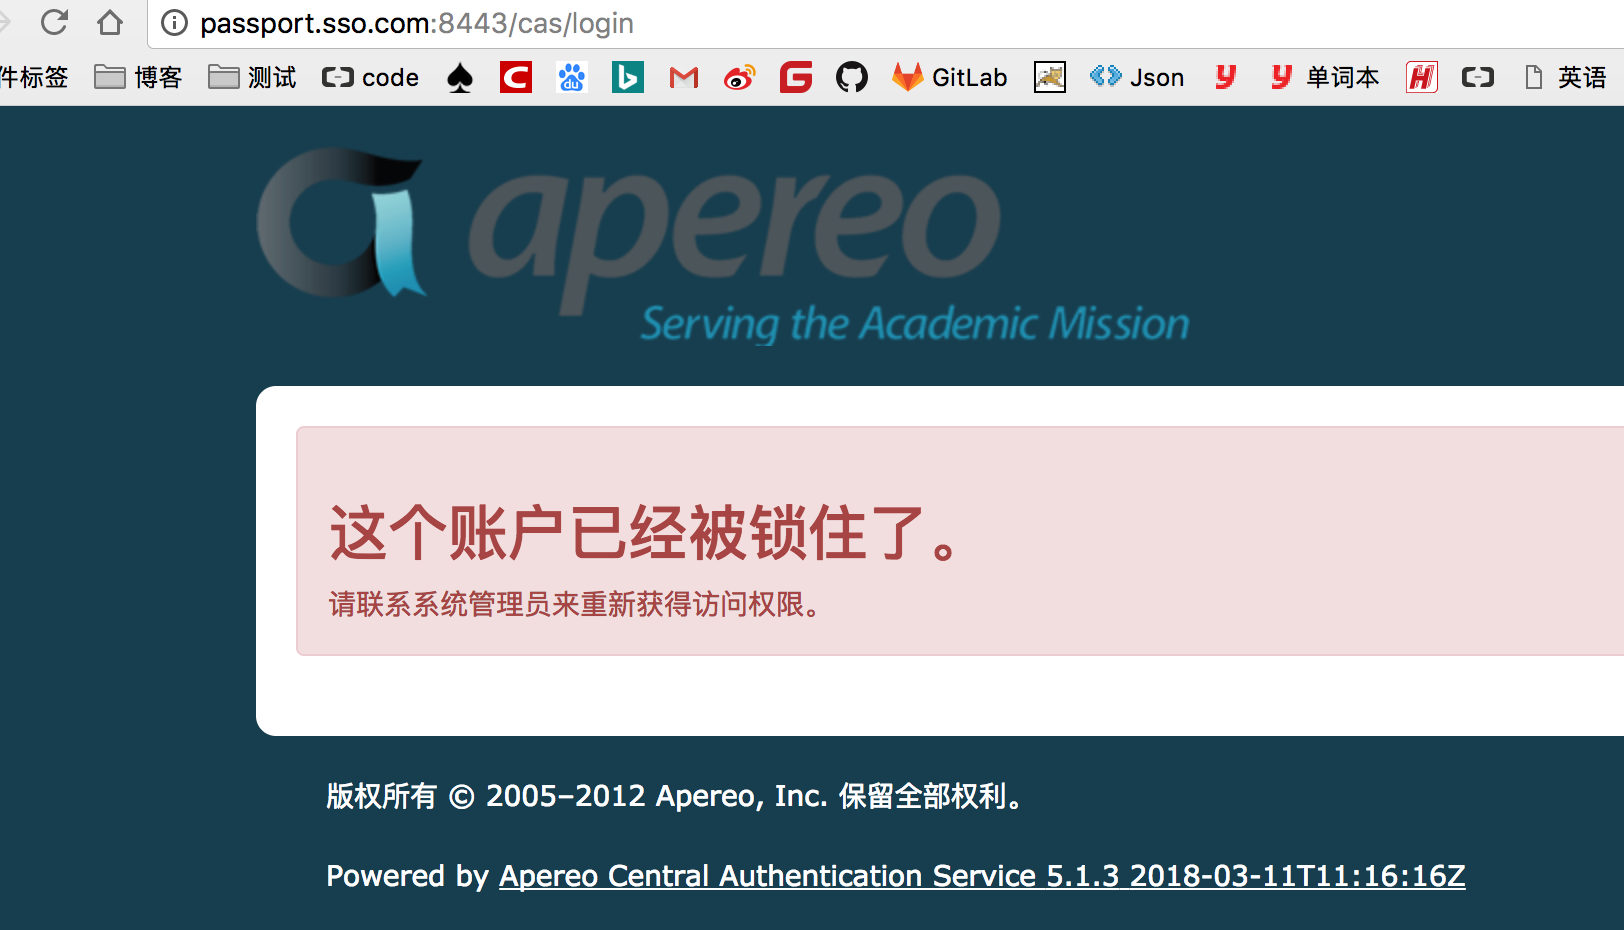
4、过期的账户,zhaosi@gmail.com ,zhaosi@gmail.com 提示认证信息无效,和密码不正确是一个状态
5.1、添加客户端获取并获取用户名
客户端,端口为8081 项目名称为 sso-client-one
1、通过总司令新建Moudule ,新建springBoot工程,总司令要聚合它,但是它还不是总司令的儿子,ddkj项目
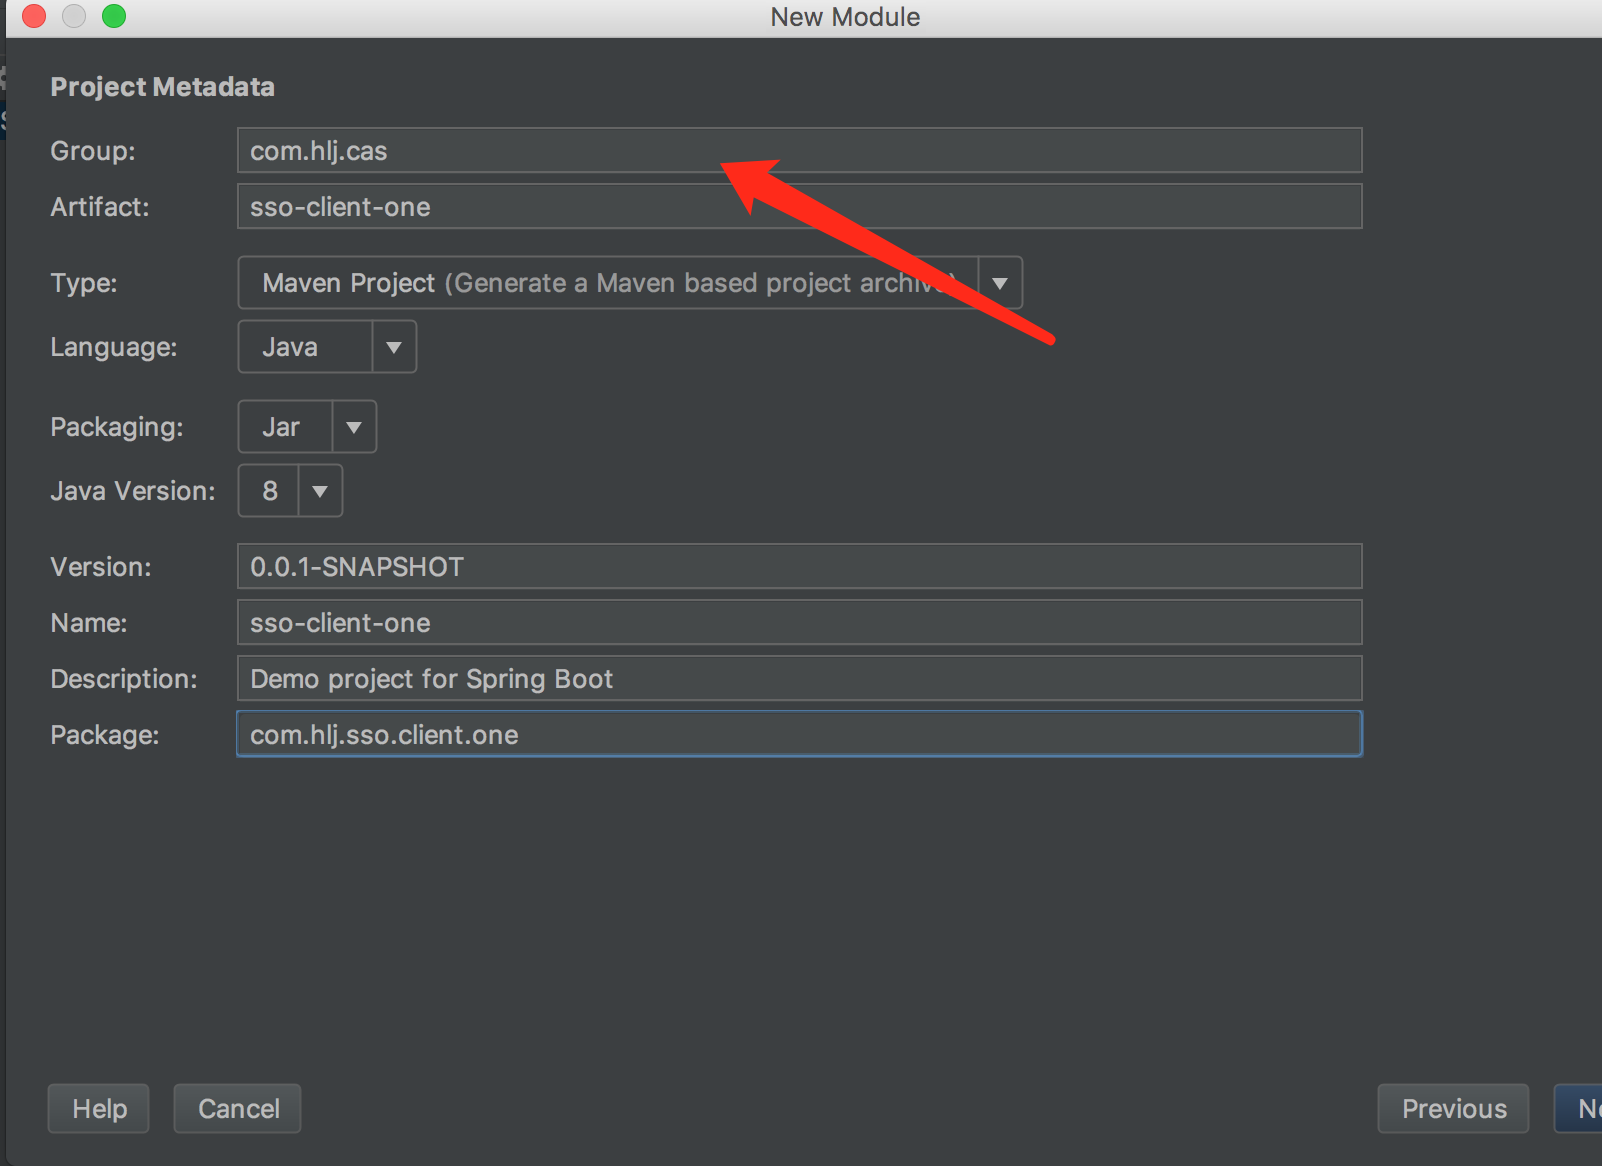
添加依赖 web,jpa,mysql(jpahe mysql以后难免会遇到,所以提前加上了)

2、总司令com-hlj-cas进行聚合,但并没有继承总司令。和ddkj有点像
<modules>
    <module>sso-server</module>
    <module>sso-server-rest</module>
    <module>sso-client-one</module>
</modules>
3、添加cas客户端依赖
<dependency>
	<groupId>org.jasig.cas.client</groupId>
	<artifactId>cas-client-core</artifactId>
	<version>3.4.1</version>
</dependency>

<dependency>
	<groupId>org.springframework.security</groupId>
	<artifactId>spring-security-core</artifactId>
	<version>4.2.3.RELEASE</version>
</dependency>

<dependency>
	<groupId>org.springframework.security</groupId>
	<artifactId>spring-security-web</artifactId>
	<version>4.2.3.RELEASE</version>
</dependency>
4、配置host,添加域名
因为有了客户端了,这个时候再用localhost就不好了,因为将来可能会有多个客户端,如果都用lcoahost 就会造成同域名相同session。这样就只能一个浏览器登录一个客户端了。和单点登录同时登录多个客户端想违背
127.0.0.1 passport.sso.com 127.0.0.1 casclientone 127.0.0.1 casclienttwo
5、配置客户端与 服务端直接的配置关系,sso-client-one的配置文件中
#cas
cas.server.url.prefix=http://passport.sso.com:8443/cas
cas.server.url.login=${cas.server.url.prefix}/login
cas.client.name=http://casclientone:${server.port}
6、客户端配置登录 ticket,登出等过滤器
package com.hlj.sso.client.one.config;

import org.jasig.cas.client.authentication.AuthenticationFilter;
import org.jasig.cas.client.session.SingleSignOutFilter;
import org.jasig.cas.client.session.SingleSignOutHttpSessionListener;
import org.jasig.cas.client.util.AssertionHolder;
import org.jasig.cas.client.util.AssertionThreadLocalFilter;
import org.jasig.cas.client.util.HttpServletRequestWrapperFilter;
import org.jasig.cas.client.validation.Cas30ProxyReceivingTicketValidationFilter;
import org.springframework.beans.factory.annotation.Value;
import org.springframework.boot.web.servlet.FilterRegistrationBean;
import org.springframework.boot.web.servlet.ServletListenerRegistrationBean;
import org.springframework.context.annotation.Bean;
import org.springframework.context.annotation.Configuration;
import org.springframework.security.web.authentication.logout.LogoutFilter;
import org.springframework.security.web.authentication.logout.SecurityContextLogoutHandler;

/**
 * @Description
 * @Author HealerJean
 * @Date   2018/3/11 下午5:37.
 */

@Configuration
public class CasConfig {

    @Value("${cas.server.url.login}")
    public String casServerLoginUrl;

    @Value("${cas.server.url.prefix}")
    public String casServerUrlPrefix;

    @Value("${cas.client.name}")
    public String casClientName;

    /**
     * 用于实现单点登出功能
     */
    @Bean
    public ServletListenerRegistrationBean<SingleSignOutHttpSessionListener> singleSignOutHttpSessionListener() {
        ServletListenerRegistrationBean<SingleSignOutHttpSessionListener> listener = new ServletListenerRegistrationBean<>();
        listener.setEnabled(true);
        listener.setListener(new SingleSignOutHttpSessionListener());
        listener.setOrder(1);
        return listener;
    }


    /**
     * 该过滤器用于实现单点登出功能,单点退出配置,一定要放在其他filter之前
     */
    @Bean
    public FilterRegistrationBean logOutFilter() {
        FilterRegistrationBean filterRegistration = new FilterRegistrationBean();

        LogoutFilter logoutFilter = new LogoutFilter(casServerUrlPrefix + "/logout?service=" + casClientName,new SecurityContextLogoutHandler());
        filterRegistration.setFilter(logoutFilter);
        filterRegistration.setEnabled(true);
        filterRegistration.addUrlPatterns("/logout");
        filterRegistration.addInitParameter("casServerUrlPrefix", casServerUrlPrefix);
        filterRegistration.addInitParameter("serverName", casClientName);
        filterRegistration.addInitParameter("redirectAfterValidation", "true");
        filterRegistration.setOrder(2);
        return filterRegistration;
    }

    /**
     * CAS Single Sign Out Filter
     * 该过滤器用于实现单点登出功能,单点退出配置,一定要放在其他filter之前
     */
    @Bean
    public FilterRegistrationBean singleSignOutFilter() {
        FilterRegistrationBean filterRegistration = new FilterRegistrationBean();
        filterRegistration.setFilter(new SingleSignOutFilter());
        filterRegistration.addUrlPatterns("/*");
        filterRegistration.addInitParameter("casServerUrlPrefix", casServerUrlPrefix);
        filterRegistration.addInitParameter("serverName", casClientName);
        filterRegistration.setOrder(3);
        return filterRegistration;
    }

    /**
     * 该过滤器负责用户的认证工作
     */
    @Bean
    public FilterRegistrationBean authenticationFilter() {
        FilterRegistrationBean filterRegistration = new FilterRegistrationBean();
        filterRegistration.setFilter(new AuthenticationFilter());
        filterRegistration.addUrlPatterns("/*");
        filterRegistration.addInitParameter("ignorePattern","/error|/public*|/assets*|/ftl*");
        filterRegistration.addInitParameter("casServerLoginUrl", casServerLoginUrl);
        filterRegistration.addInitParameter("encoding","UTF-8");
        filterRegistration.addInitParameter("serverName", casClientName);
        filterRegistration.addInitParameter("useSession", "true");
        filterRegistration.setOrder(4);
        return filterRegistration;
    }


    /**
     * 该过滤器负责对Ticket的校验工作
     */
    @Bean
    public FilterRegistrationBean cas20ProxyReceivingTicketValidationFilter() {
        FilterRegistrationBean filterRegistration = new FilterRegistrationBean();
        Cas30ProxyReceivingTicketValidationFilter filter = new Cas30ProxyReceivingTicketValidationFilter();
        filterRegistration.setFilter(filter);
        filterRegistration.addUrlPatterns("/*");
        filterRegistration.addInitParameter("encoding","UTF-8");
        filterRegistration.addInitParameter("casServerUrlPrefix", casServerUrlPrefix);
        filterRegistration.addInitParameter("serverName", casClientName);
        filterRegistration.setOrder(5);
        return filterRegistration;
    }

    /**
     * 该过滤器对HttpServletRequest请求包装, 可通过HttpServletRequest的getRemoteUser()方法获得登录用户的登录名
     */
    @Bean
    public FilterRegistrationBean httpServletRequestWrapperFilter() {
        FilterRegistrationBean filterRegistration = new FilterRegistrationBean();
        filterRegistration.setFilter(new HttpServletRequestWrapperFilter());
        filterRegistration.setEnabled(true);
        filterRegistration.addUrlPatterns("/*");
        filterRegistration.setOrder(6);
        return filterRegistration;
    }

    /**
     * 该过滤器使得可以通过org.jasig.cas.client.util.AssertionHolder来获取用户的登录名。
     * 比如AssertionHolder.getAssertion().getPrincipal().getName()。
     * 这个类把Assertion信息放在ThreadLocal变量中,这样应用程序不在web层也能够获取到当前登录信息
     */
    @Bean
    public FilterRegistrationBean assertionThreadLocalFilter() {
        FilterRegistrationBean filterRegistration = new FilterRegistrationBean();
        filterRegistration.setFilter(new AssertionThreadLocalFilter());
        filterRegistration.setEnabled(true);
        filterRegistration.addUrlPatterns("/*");
        filterRegistration.setOrder(7);
        return filterRegistration;
    }


    public static class RemoteUserUtil {

        public static Boolean hasLogin(){
            return AssertionHolder.getAssertion() != null;
        }

        /**
         * 获取单点登录用户id
         * @return
         */
        public static Long getRemoteUserId(){
            Object userId = AssertionHolder.getAssertion().getPrincipal().getAttributes().get("id");
            return userId == null ? null : Long.parseLong(userId.toString());
        }

        /**
         * 获取单点登录用户账户
         * @return
         */
        public static String getRemoteUserAccount(){
            return AssertionHolder.getAssertion().getPrincipal().getName();
        }

        /**
         * 获取单点登录用户名称
         * @return
         */
        public static String getRemoteUserName(){
            Object userName = AssertionHolder.getAssertion().getPrincipal().getAttributes().get("name");
            return userName == null ? null : userName.toString();
        }

        /**
         * 是否超级管理员
         * @return
         */
        public static boolean getRemoteUserSuper(){
            Object isSuper = AssertionHolder.getAssertion().getPrincipal().getAttributes().get("isSuper");
            return isSuper != null && isSuper.toString().equals("1");
        }
    }
}
7、添加controller,进行 浏览访问获取来自服务端的用户名
package com.hlj.sso.client.one.controller;


import org.jasig.cas.client.authentication.AttributePrincipal;
import org.jasig.cas.client.util.AbstractCasFilter;
import org.jasig.cas.client.util.AssertionHolder;
import org.jasig.cas.client.validation.Assertion;
import org.slf4j.Logger;
import org.slf4j.LoggerFactory;
import org.springframework.stereotype.Controller;
import org.springframework.web.bind.annotation.GetMapping;
import org.springframework.web.bind.annotation.ResponseBody;

import javax.servlet.http.HttpServletRequest;

@Controller
public class HomeController {

    Logger logger = LoggerFactory.getLogger(HomeController.class);
    @GetMapping("hello")
    @ResponseBody
    public String home(HttpServletRequest request){


        String remoteUser =request.getRemoteUser();
        logger.info("1、request.getRemoteUser()"+remoteUser);


        //断言
        Assertion assertion = (Assertion) request.getSession().getAttribute(AbstractCasFilter.CONST_CAS_ASSERTION);
        AttributePrincipal principal = assertion.getPrincipal();
        String username =  principal.getName();
        logger.info("2、AttributePrincipal.getName"+username);


        String user3 = AssertionHolder.getAssertion().getPrincipal().getName();
        logger.info("3、AssertionHolder.getAssertion().getPrincipal().getName()"+user3);

        return  null;
    }

}
8、朋友们真正牛逼的时候,到了,
启动sso-server 8843, sso-server-rest 8888, sso-client-one 8081
浏览器中输入 http://casclientone:8081/hello 哈哈搞笑的事情出现了,他说没有经过服务端认证就访问了,原来是没有介入service
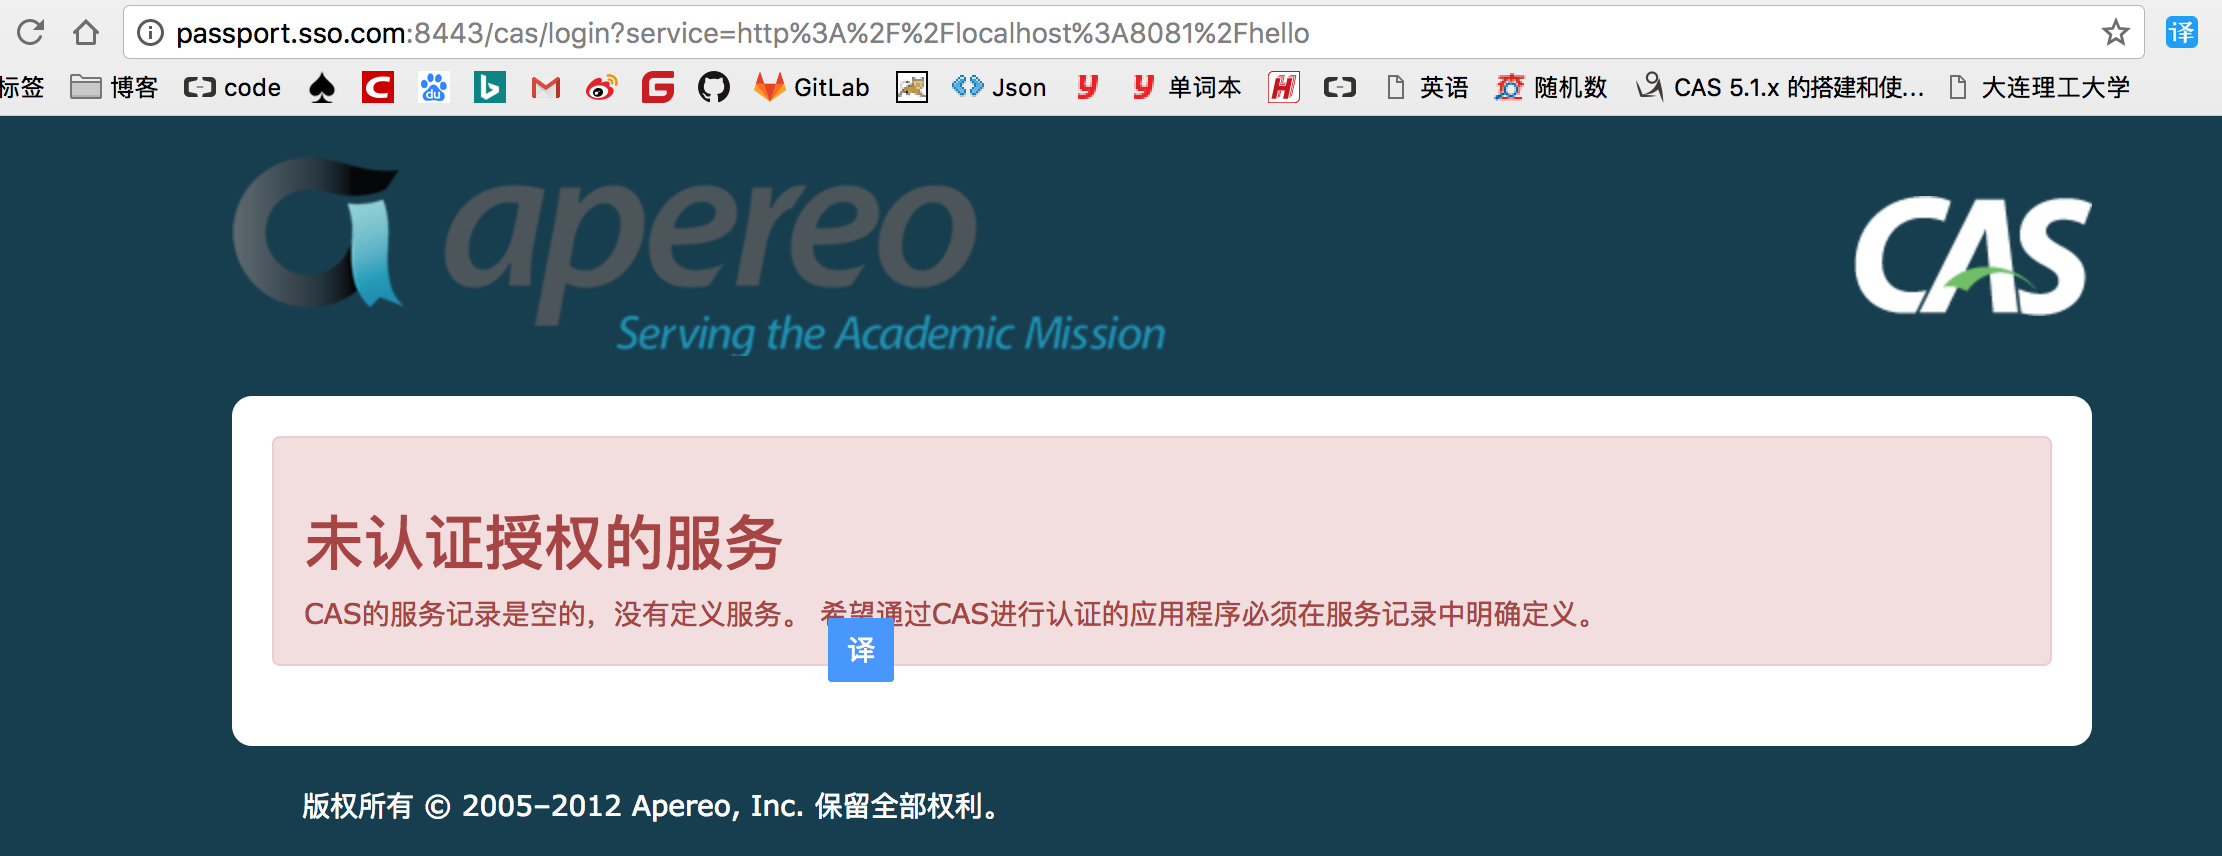
1、接入service
cas客户端接入称之为service,必须经过cas的允许才能进行登录
当然不同的客户端可以做不同的事情,其中包括: • 自定义主题(各客户端登录页自定义) • 自定义属性(服务属性(固定)与用户属性(动态)) • 自定义协议 • 自定义登录后跳转方式,跳转路径 • 授权策略(拒绝属性、可登录时间范围限制、等等) • 拒绝授权模式 接下来来一个FAQ A: 什么是service,根cas有什么关系? B: service是使用型cas是服务型,cas好比游乐园,service好比来游乐园的游客
A: 那service如何对接cas?service如何知道是否被允许接入? B: 好比游客需要进入游乐园,那么游客需要门票,获取门票有多种方式,可以用手机校验码,或者身份证进行获取。当然如果是犯罪分子门票都买不了,更何况进去游乐园
A: 具体service如何作为客户端使用? B: 好比买门票,必须填写身份证号、手机号、付款等流程,当然也可以通过不同渠道购买,cas也有不同的客户端实现,cas client、pac4j等
A: service接入有何好处?
B: 被接入的service无需进行输入密码即可进入系统,好比A-service(OA系统)登录了,B-service(账单系统),C-service(CRM系统)无需再次登录,传统的方式有10个八个系统进行登录,用户会疯掉,开发员也需要管理多个系统的帐号数据 说了一大推,不如来点正事,例如怎么配置,如何管理,马上马上~~
1、sso-server 配置文件中添加
# 5、 service 用于客户端启用,以及主题等
#开启识别json文件,默认false
cas.serviceRegistry.initFromJson=true
#自动扫描服务配置,默认开启
#cas.serviceRegistry.watcherEnabled=true
#120秒扫描一遍
#cas.serviceRegistry.repeatInterval=120000
#延迟15秒开启
#cas.serviceRegistry.startDelay=15000
#默认json/yml资源加载路径为resources/services
#cas.serviceRegistry.config.location=classpath:/services
2、resource/service 新建json文件 Apereo-10000002.json
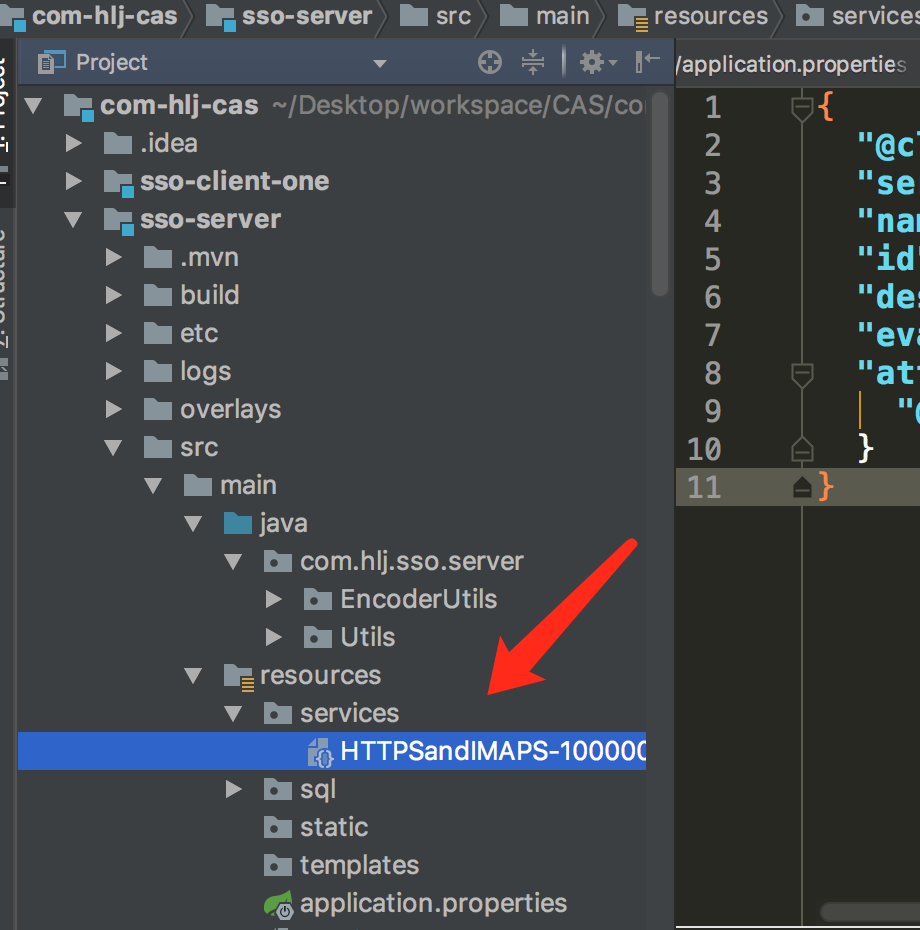
{
  "@class" : "org.apereo.cas.services.RegexRegisteredService",
  "serviceId" : "^(https|imaps|http)://.*",
  "name" : "HTTPS and IMAPS",
  "id" : 10000001,
  "description" : "This service definition authorizes all application urls that support HTTPS and IMAPS and HTTP protocols.",
  "evaluationOrder" : 1,
  "attributeReleasePolicy": {
    "@class": "org.apereo.cas.services.ReturnAllAttributeReleasePolicy"
  }
}
小插曲,再加一条,如果配置了这个,那么启动起来之后就会出现下面的东东

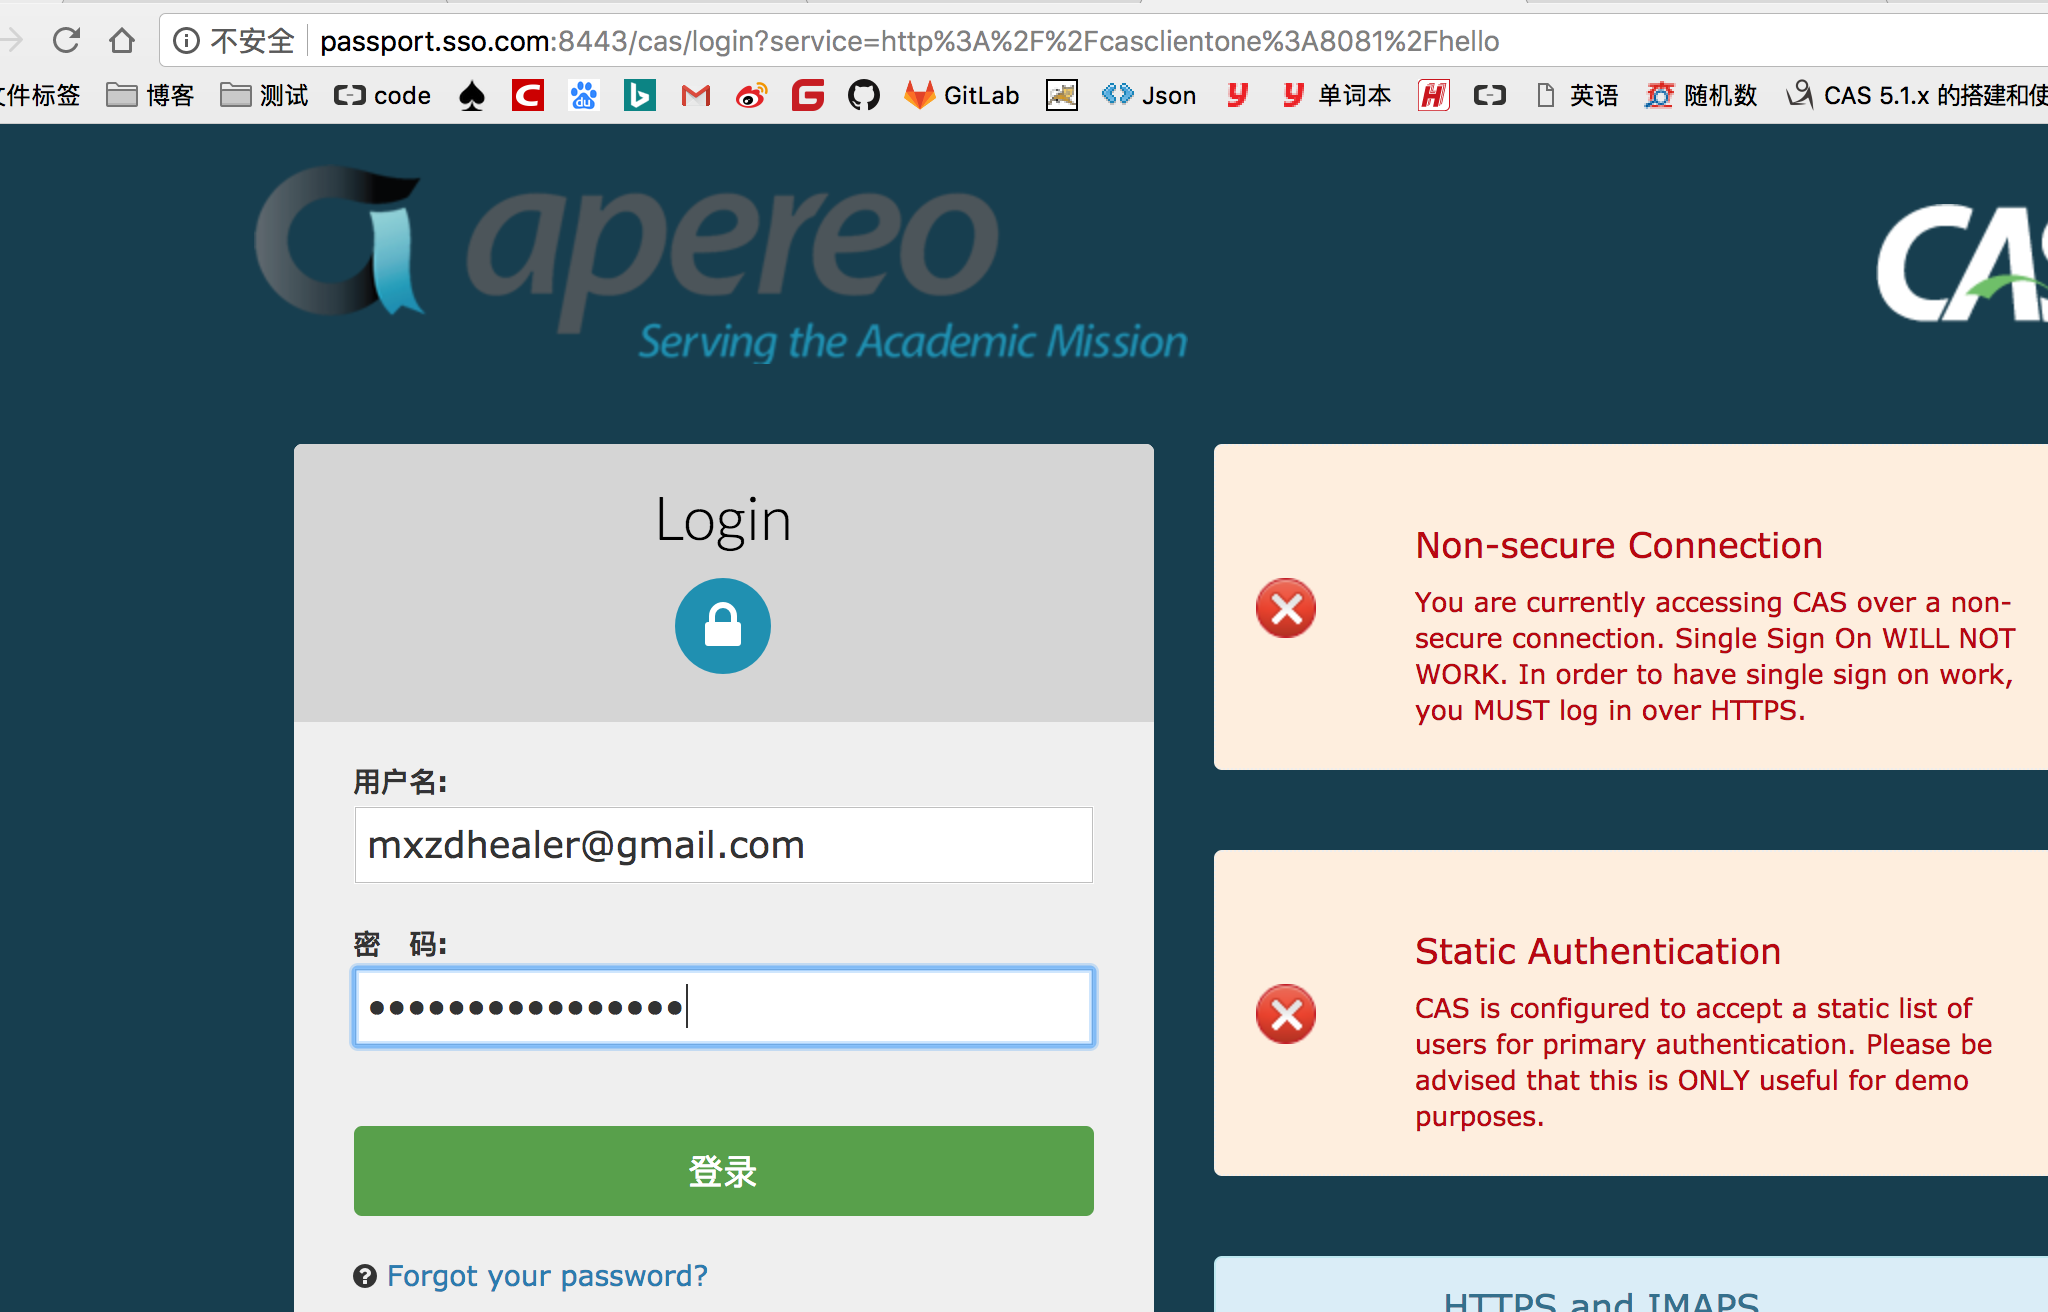
4、重新启动吧,朋友们小插曲很重要哦
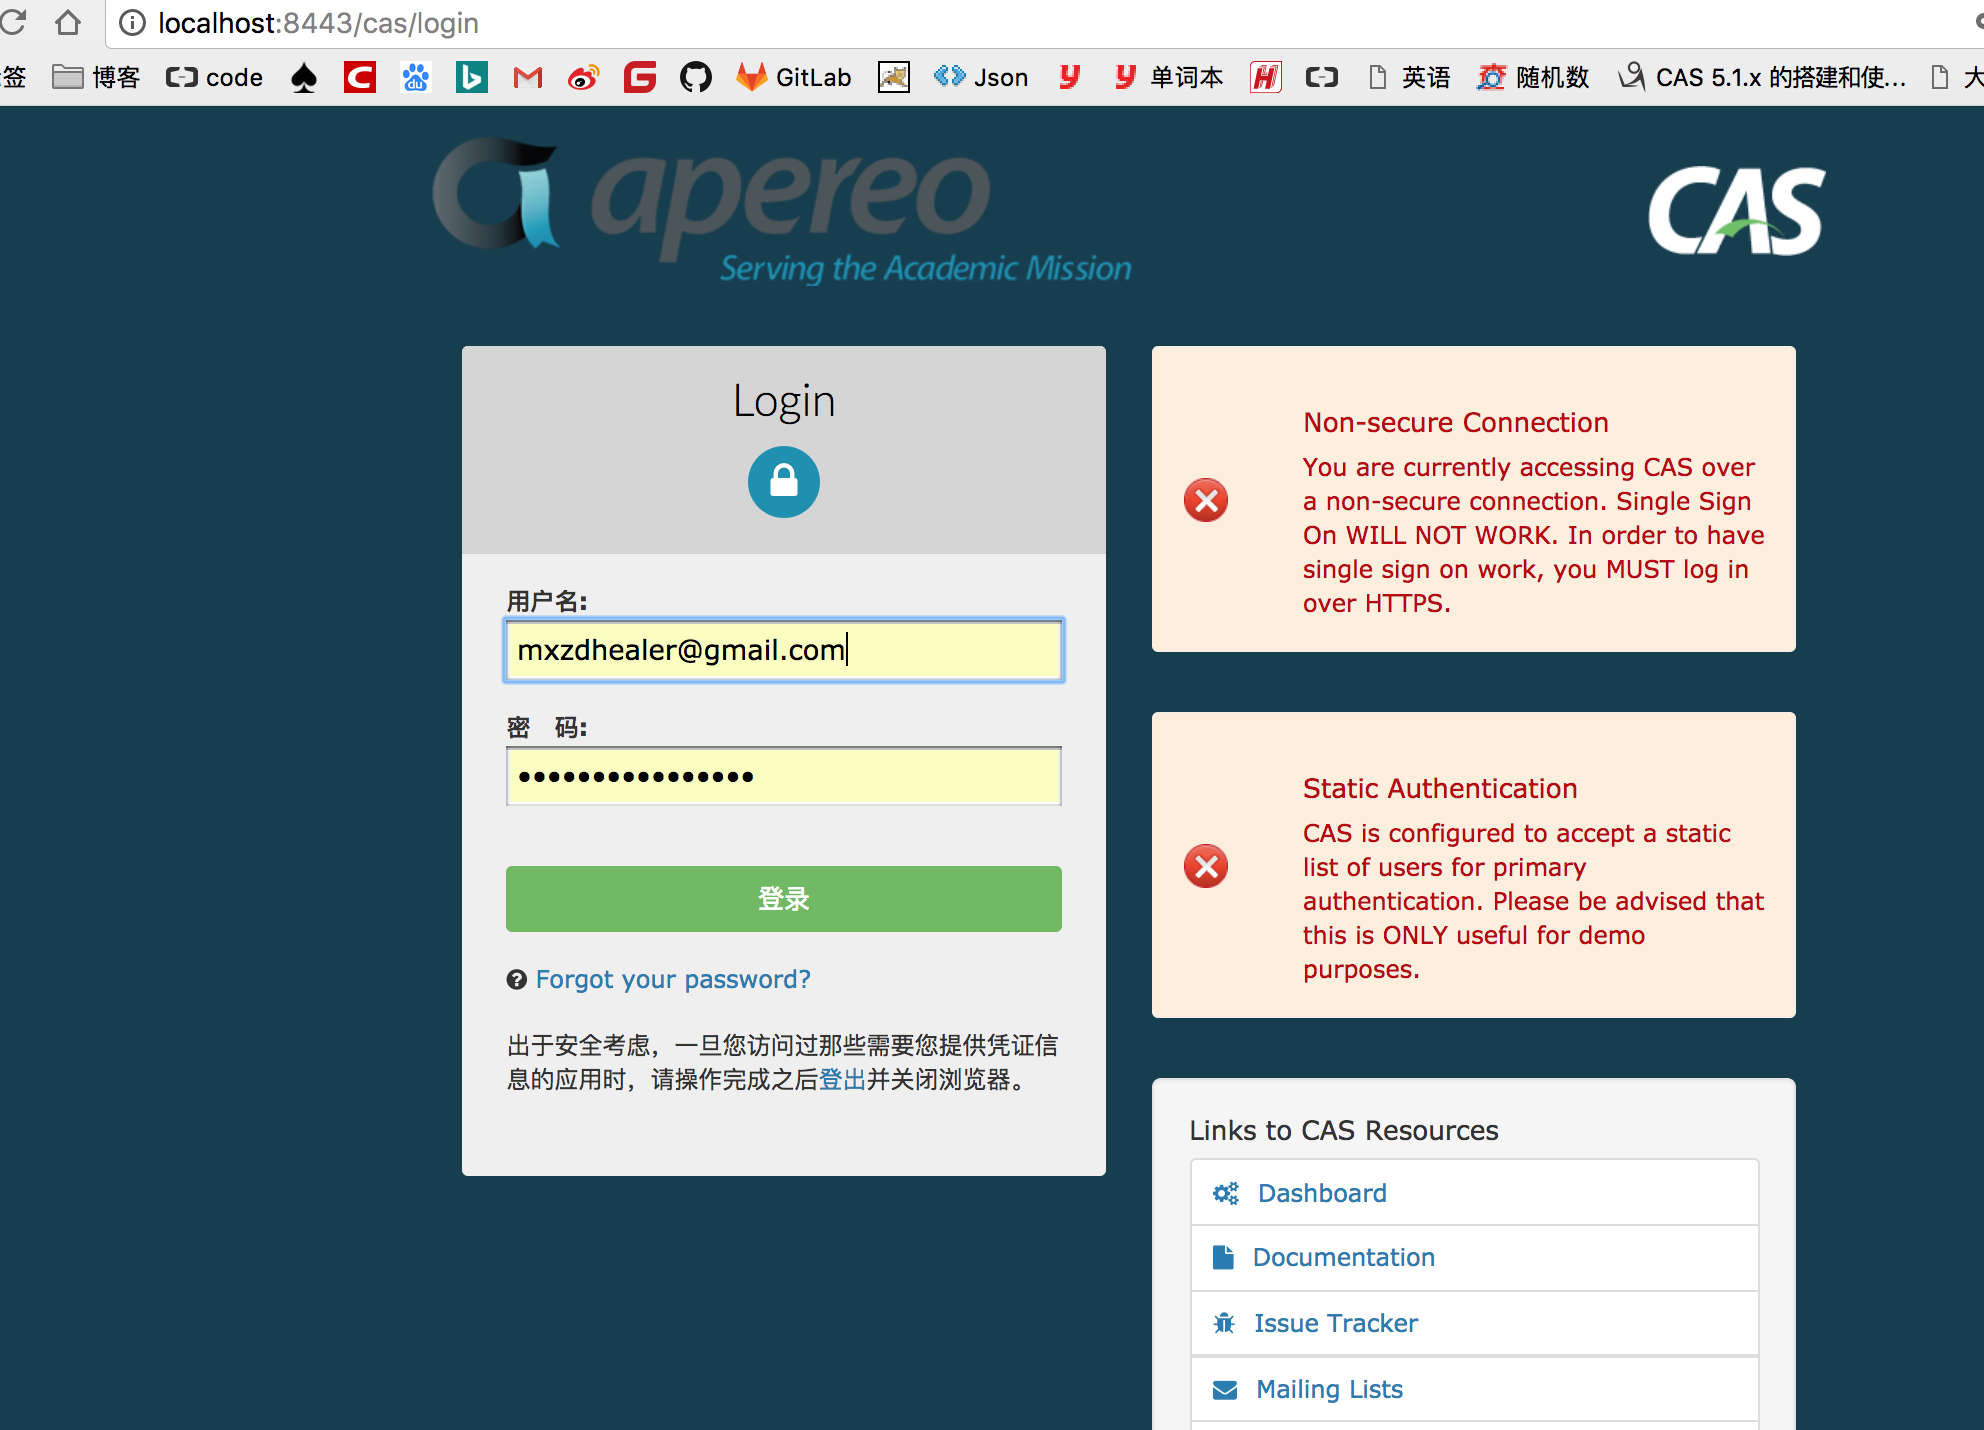
浏览器中输入 http://casclientone:8081/hello 自动到到了cas登录页面浏览器中变成了,下图所示
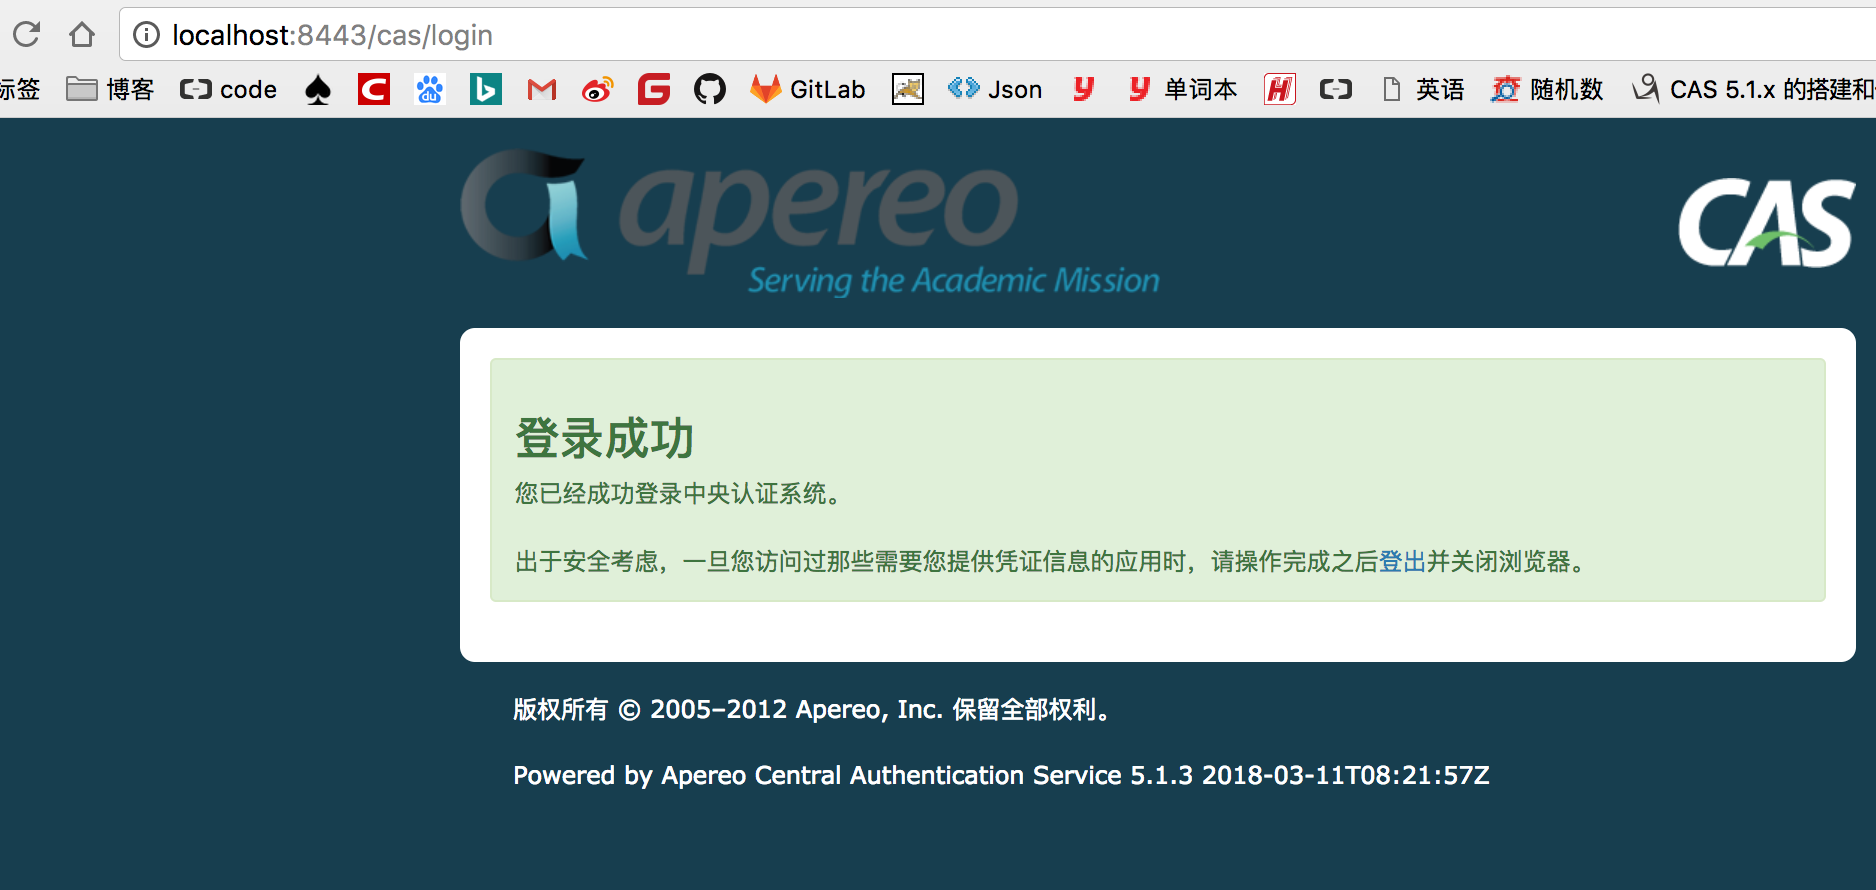
登录成功 浏览器地址变成了 http://casclientone:8081/hello;jsessionid=4463DE12AB6D84330D7A847449D95BA1
9、观察客户端控制台,取到了服务端过来的用户名

5.2 客户端配置不需要浏览器访问的链接
其实就是添加个过滤器路径url而已,让它不要被拦截
1、添加contllor中url
@GetMapping("url")
@ResponseBody
public String url(){
    return  "这个路径没有被拦截";
}
2、把 要拦截的url路径名字放入
filterRegistration.addInitParameter("ignorePattern","/error|/public*|/assets*|/ftl*|url*");
@Bean
public FilterRegistrationBean authenticationFilter() {
    FilterRegistrationBean filterRegistration = new FilterRegistrationBean();
    filterRegistration.setFilter(new AuthenticationFilter());
    filterRegistration.addUrlPatterns("/*");
    filterRegistration.addInitParameter("ignorePattern","/error|/public*|/assets*|/ftl*|url*");
    filterRegistration.addInitParameter("casServerLoginUrl", casServerLoginUrl);
    filterRegistration.addInitParameter("encoding","UTF-8");
    filterRegistration.addInitParameter("serverName", casClientName);
    filterRegistration.addInitParameter("useSession", "true");
    filterRegistration.setOrder(4);


    return filterRegistration;
}
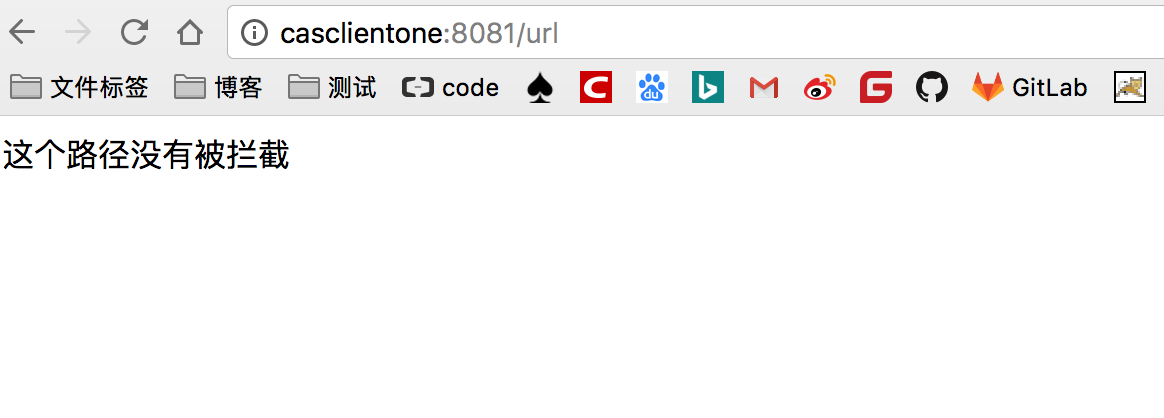
3、启动吧,浏览器中直接访问
http://casclientone:8081/url
5.3、从服务的获取更加详细的信息,不是用了密码校验哦
1、服务端配置查询的详细信息
# 6、服务端返回客户端详细的用户信息
cas.authn.attributeRepository.jdbc[0].singleRow=true
cas.authn.attributeRepository.jdbc[0].order=0
cas.authn.attributeRepository.jdbc[0].url=jdbc:mysql://localhost:3306/casnew?allowMultiQueries=true&zeroDateTimeBehavior=convertToNull
cas.authn.attributeRepository.jdbc[0].user=root
cas.authn.attributeRepository.jdbc[0].password=123456

#username 返回登录的时候的提供的用户名,配置为和数据库一致,观察ddkj即可发现这里配置的为email,主要看登录的是什么
cas.authn.attributeRepository.jdbc[0].username=email
#使用邮箱登录的
cas.authn.attributeRepository.jdbc[0].sql=select * from sys_user_rest_salt where email=?
# 下面这里为配置要返回的信息,要返回的信息为email,address
cas.authn.attributeRepository.jdbc[0].attributes.id=id
cas.authn.attributeRepository.jdbc[0].attributes.email=email
cas.authn.attributeRepository.jdbc[0].attributes.address=address
cas.authn.attributeRepository.jdbc[0].dialect=org.hibernate.dialect.MySQL5Dialect
cas.authn.attributeRepository.jdbc[0].ddlAuto=none
cas.authn.attributeRepository.jdbc[0].driverClass=com.mysql.jdbc.Driver
cas.authn.attributeRepository.jdbc[0].leakThreshold=10
cas.authn.attributeRepository.jdbc[0].propagationBehaviorName=PROPAGATION_REQUIRED
cas.authn.attributeRepository.jdbc[0].batchSize=1
cas.authn.attributeRepository.jdbc[0].healthQuery=SELECT 1
cas.authn.attributeRepository.jdbc[0].failFast=true
2、客户端接收服务端的详细参数
   String email =   AssertionHolder.getAssertion().getPrincipal().getAttributes().get("email").toString();
        String address =   AssertionHolder.getAssertion().getPrincipal().getAttributes().get("address").toString();
        logger.info("4、id邮箱和地址:"+id+"|"+email+"|"+address);
整个 controller如下
package com.hlj.sso.client.one.controller;


import org.jasig.cas.client.authentication.AttributePrincipal;
import org.jasig.cas.client.util.AbstractCasFilter;
import org.jasig.cas.client.util.AssertionHolder;
import org.jasig.cas.client.validation.Assertion;
import org.slf4j.Logger;
import org.slf4j.LoggerFactory;
import org.springframework.stereotype.Controller;
import org.springframework.web.bind.annotation.GetMapping;
import org.springframework.web.bind.annotation.ResponseBody;

import javax.servlet.http.HttpServletRequest;

@Controller
public class HomeController {

    Logger logger = LoggerFactory.getLogger(HomeController.class);
    @GetMapping("hello")
    @ResponseBody
    public Logger home(HttpServletRequest request){


        String remoteUser =request.getRemoteUser();
        logger.info("1、request.getRemoteUser()"+remoteUser);


        //断言
        Assertion assertion = (Assertion) request.getSession().getAttribute(AbstractCasFilter.CONST_CAS_ASSERTION);
        AttributePrincipal principal = assertion.getPrincipal();
        String username =  principal.getName();
        logger.info("2、AttributePrincipal.getName"+username);


        String user3 = AssertionHolder.getAssertion().getPrincipal().getName();
        logger.info("3、AssertionHolder.getAssertion().getPrincipal().getName()"+user3);

        /**
         * 加上 其他参数以后的
         */
        String id =   AssertionHolder.getAssertion().getPrincipal().getAttributes().get("id").toString();

        String email =   AssertionHolder.getAssertion().getPrincipal().getAttributes().get("email").toString();
        String address =   AssertionHolder.getAssertion().getPrincipal().getAttributes().get("address").toString();
        logger.info("4、id邮箱和地址:"+id+"|"+email+"|"+address);
        return  null;

    }

    @GetMapping("url")
    @ResponseBody
    public String url(){
        return  "这个路径没有被拦截";
    }
}
3、浏览器访问测试,登陆成功。客户端控制台如下
http://casclientone:8081/hello

6、代码下载
7、完成这一文章实属不易,希望能多多支持,能打赏就更好了